Setting up your account and workspace
Learn how to sign up for an account and access the MAAP.
Warning
At this time, access to MAAP is limited to members of teams who are already using the system. Your access request will not be processed if you do not have a sponsor who is already using MAAP.
Signing up for an Earthdata Login account
The MAAP offers accounts for NASA users through Earthdata Login. Before accessing the MAAP as a NASA user, you will need to create an Earthdata Login account. Anyone can register for an Earthdata Login profile here: https://urs.earthdata.nasa.gov/users/new.
Signing up for a new MAAP account
Once registered, you can register for a MAAP account by navigating to the MAAP Hub at https://hub.maap-project.org/. On your first visit, select the “Login with EarthData Account” button shown here:
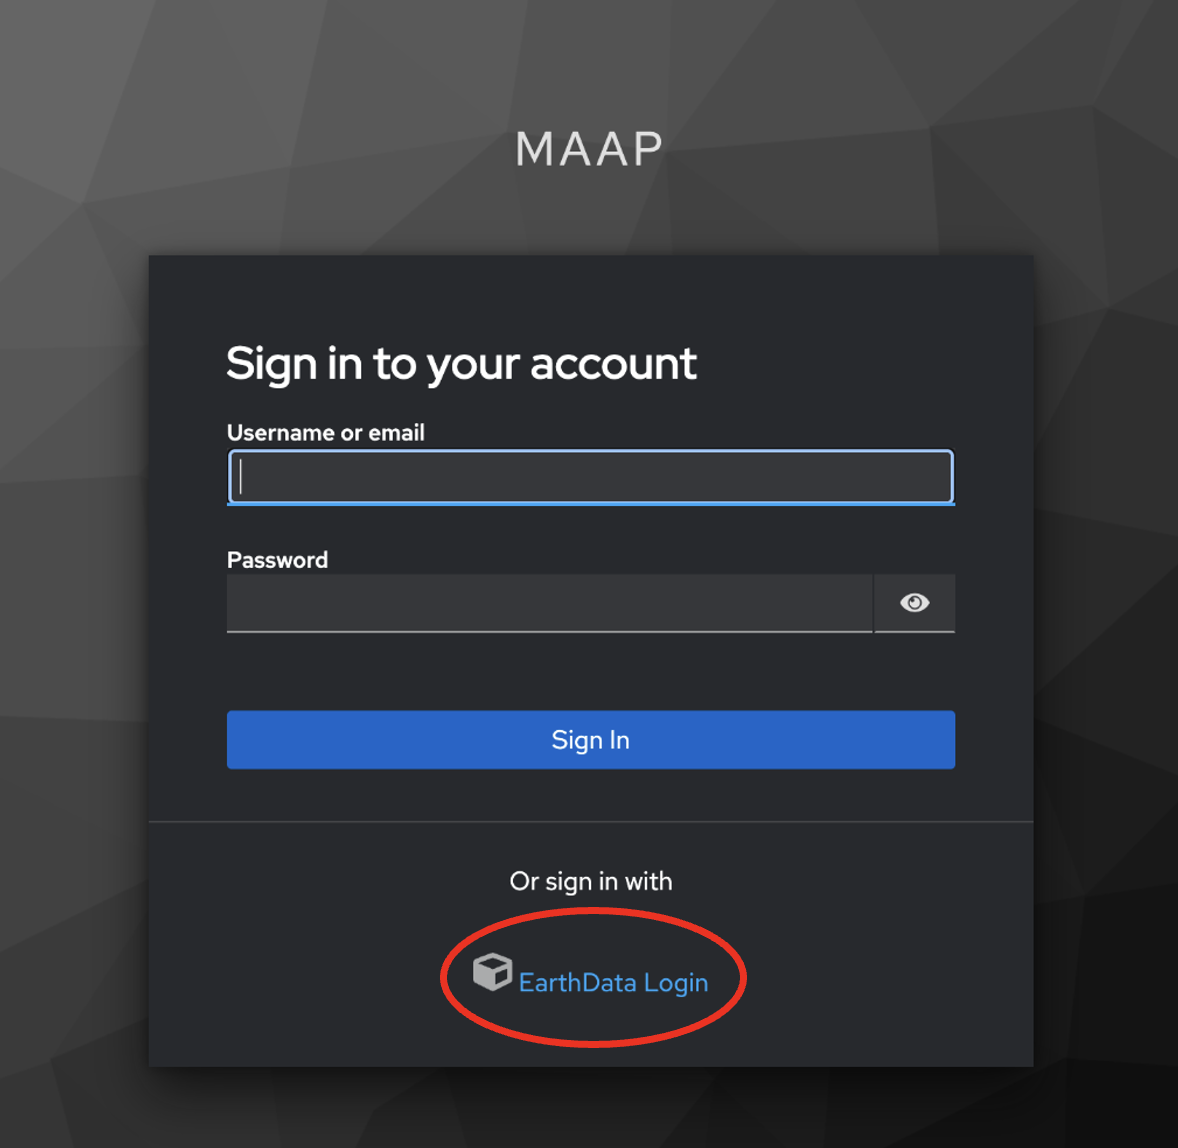
Once registered, you will be redirect to this page 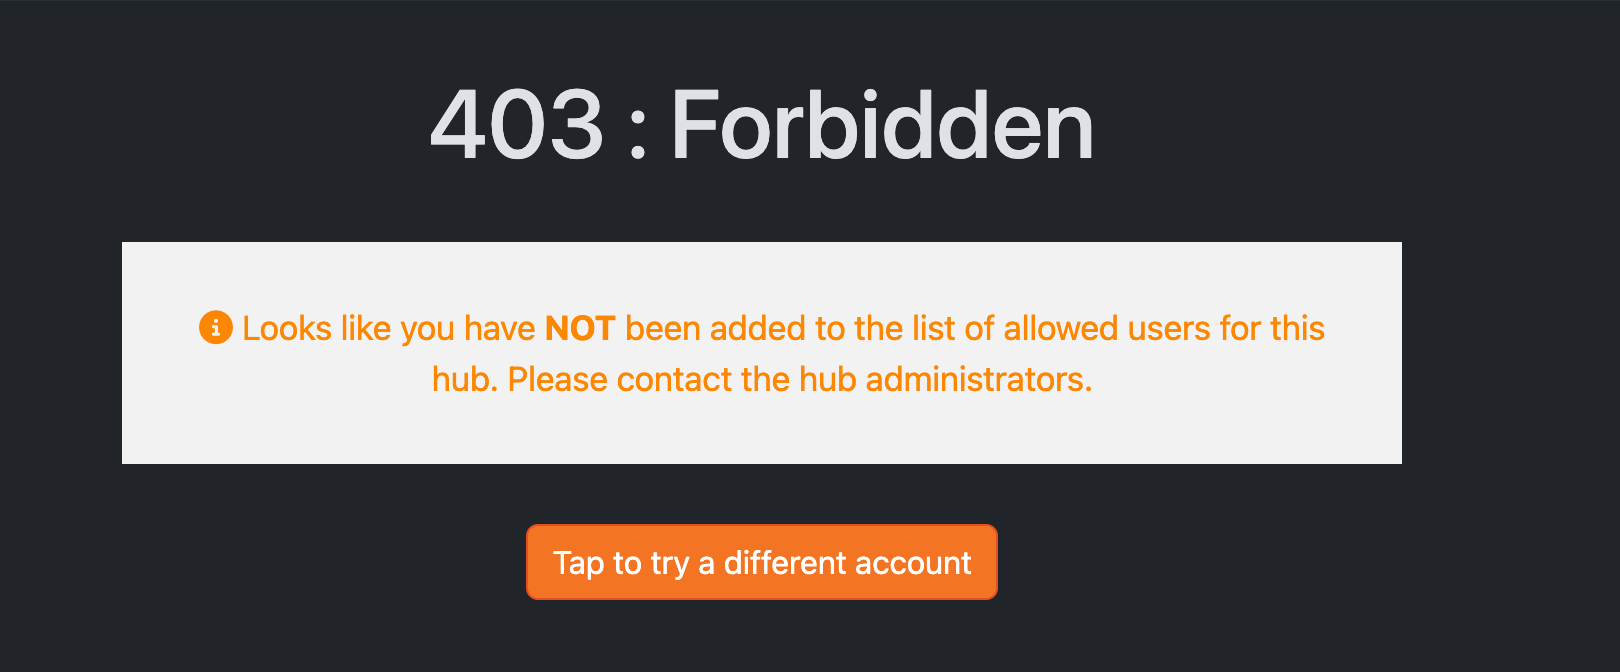
At this point, a MAAP administrator will approve your account, which will grant you access to the MAAP Hub. Remember, access is only granted to known users in the biomass science community and other projects directly related to MAAP. To check on the status of your pending account, contact the MAAP team at support@maap-project.org.
Note
Once your MAAP account is approved, you will receive an email notification using the address of your Earthdata Login account to let you know that your access is enabled.
Logging in
Navigate to https://hub.maap-project.org/ in Chrome or Firefox. You should be redirected to a page that looks like this:
Click the “Sign in with EarthData Login” button. If this is your first time logging in, you should be redirected to an EarthData Login page that looks like this:
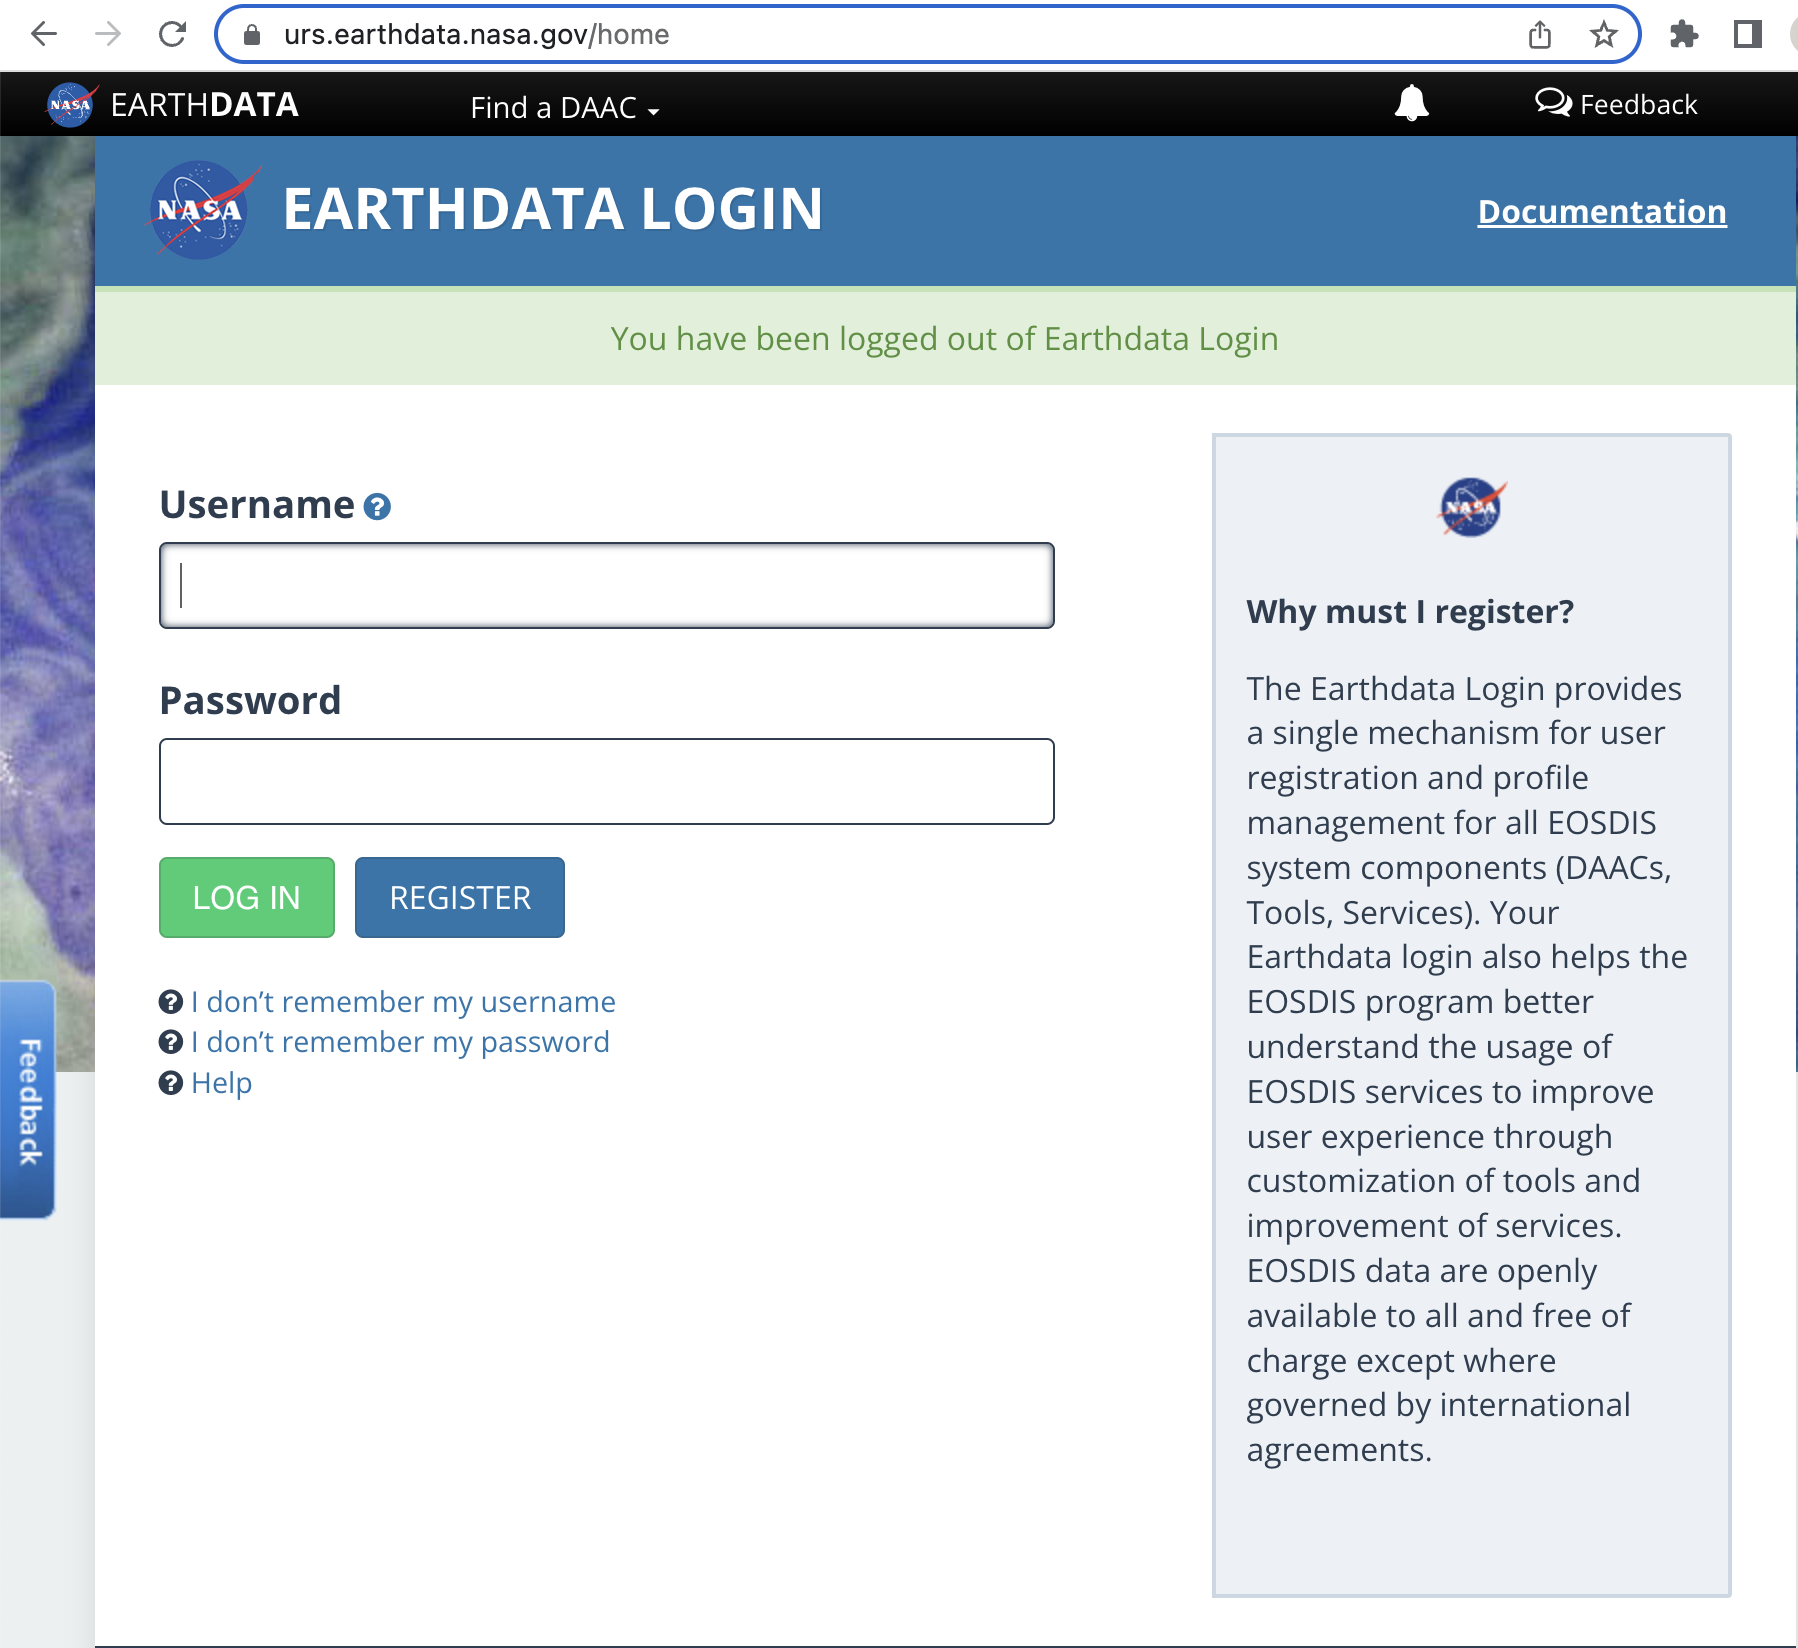
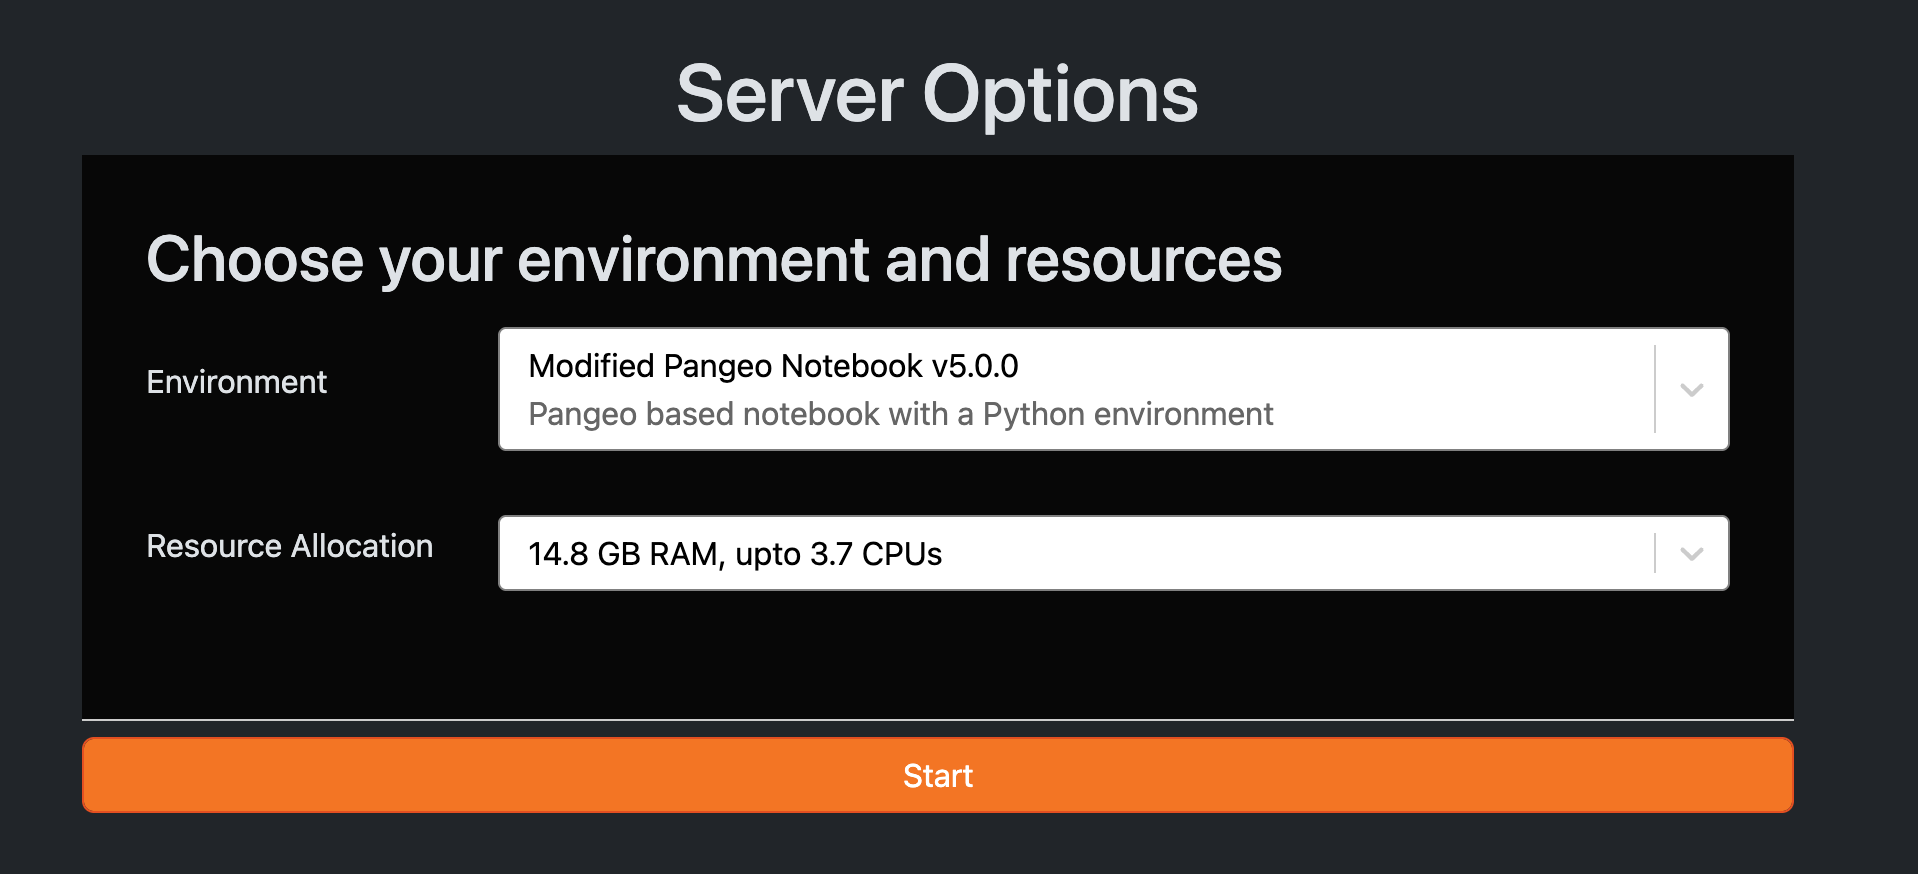
Enter your “EarthData Login” account credentials here and click “Log in”. You should see a temporary page that says “Redirecting”, followed by the MAAP Hub launch page:
Creating a workspace
Workspaces are effectively a JupyterLab “computer in the cloud”. To get started with Jupyter you need to create a workspace.
Overview of our images:
Pangeo image: Built from Pangeo notebook image: https://github.com/pangeo-data/pangeo-docker-images/blob/master/pangeo-notebook/environment.yml
isce3 image: Built from Pangeo base notebook with these packages installed: https://github.com/MAAP-Project/maap-workspaces/blob/main/base_images/2i2c/isce3/environment.yml
R image: A couple Python packages: https://github.com/MAAP-Project/maap-workspaces/blob/main/base_images/2i2c/r/environment.yml and these R packages installed with CRAN or R universe: https://github.com/MAAP-Project/maap-workspaces/blob/main/base_images/2i2c/r/scripts/install_cran_packages_r.sh
Select an image to launch. If you are not sure what image you want, we recommend you start with the “Modified Pangeo Notebook” image. You can configure your resource allocation here. You need at least 14.8GB RAM to use conda
After choosing your image, you will see a loading screen – wait for it to finish loading.
Once the workspace has loaded, you should see a Jupyter interface that looks like this
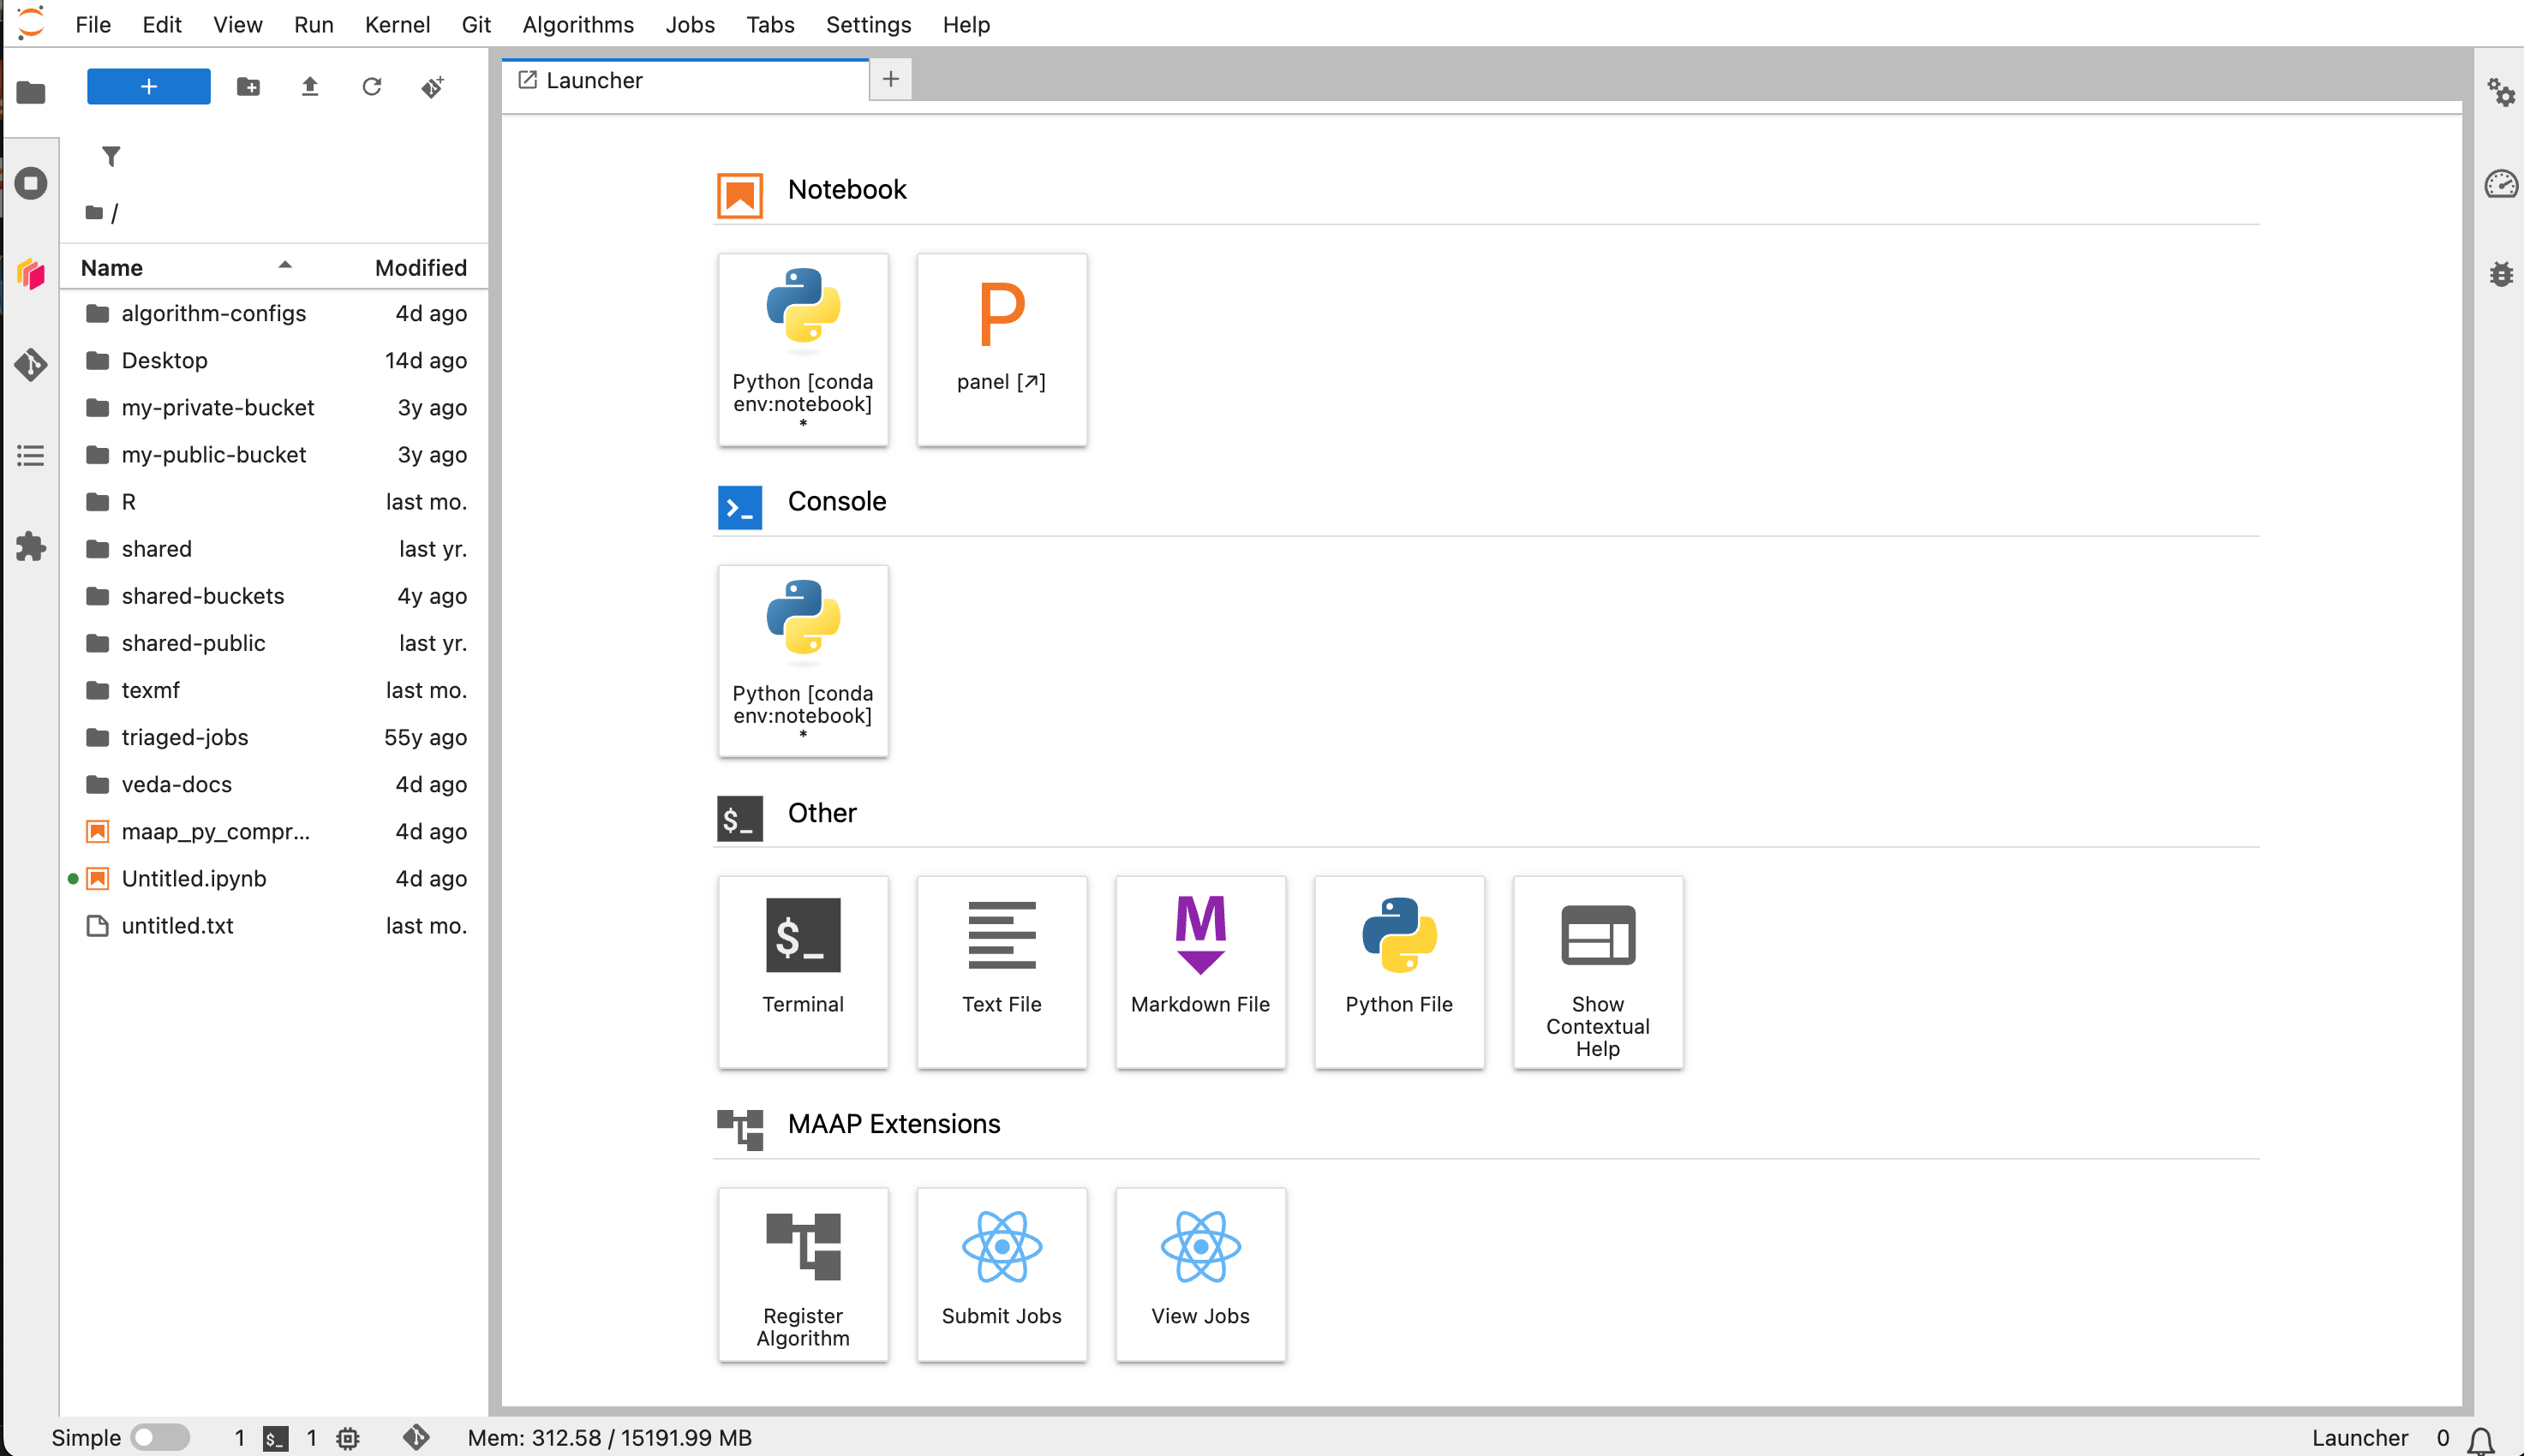
Access the Hub Control panel from an active workspace by File -> Hub Control Panel. From here you can launch a new workspace 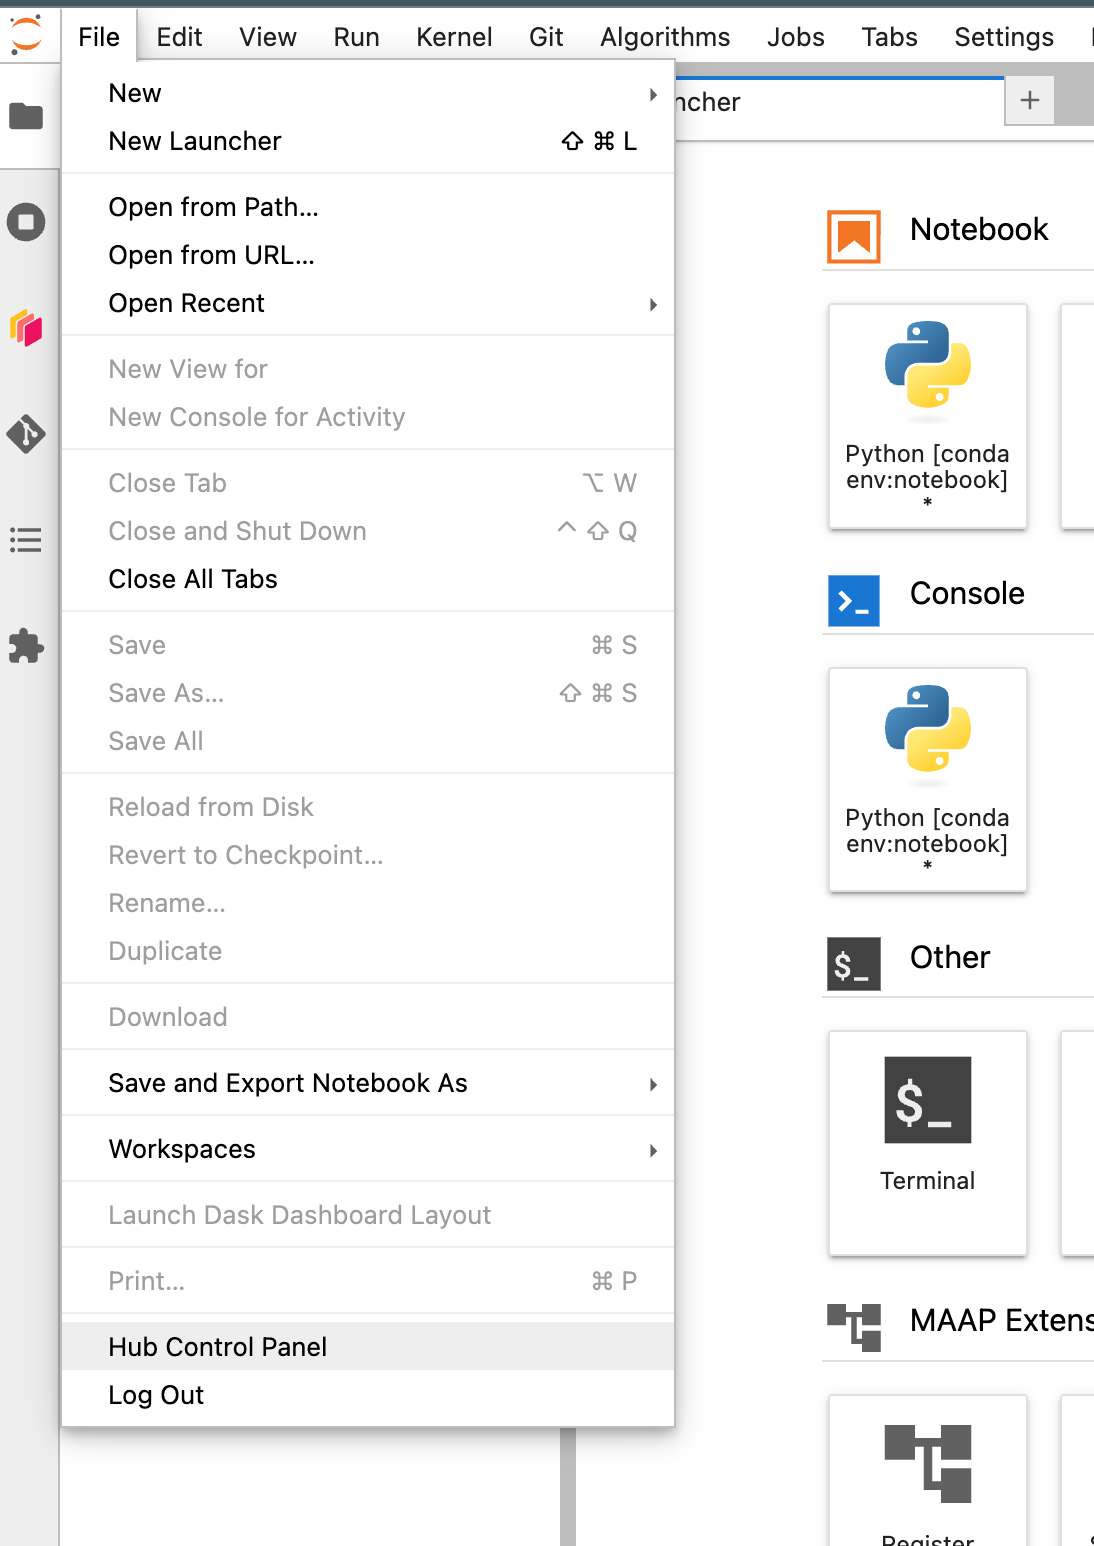
More information about JupyterHub: https://jupyterhub.readthedocs.io/en/stable/tutorial/index.html#getting-started
Jupyter Interface overview
When you first log in you may see a notification in the bottom right about a guided tour. Feel free to view the tour, which will give you a quick overview of the Jupyter user interface. You can also find the MAAP Tour in the Help menu at any time. 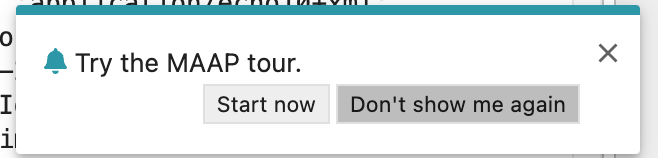
In addition to typical JupyterLab menu bar and sidebar configuration:
MAAP Jupyter Menus

Git: Open repo in terminal, init, or clone repo.
Jobs: Users may submit jobs through the submit tab and view their jobs through the view tab.
Help: The help menu has several customized extensions and references to the MAAP documentation.
MAAP Jupyter Sidebar
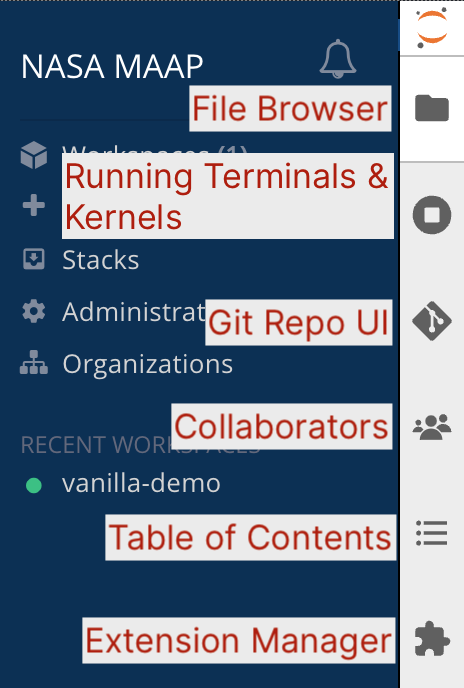
File Browser
Running Terminals & Kernels
Git Repo Interface (if this folder is a Git repo)
Collaborators
Table of Contents
Extension Manager
MAAP Blue Sidebar
Workspaces: See workspaces, share them, as well as configure settings
Stacks: See available platforms for workspaces & required memory
Administration: Control the configuration & policies for your installation.
Organizations: allow groups of developers to collaborate with private & shared workspaces. Resources & permissions are controlled & allocated within the organization by admin.
Profile (bottom, labeled with your name): See account info, logout
MAAP Storage Options
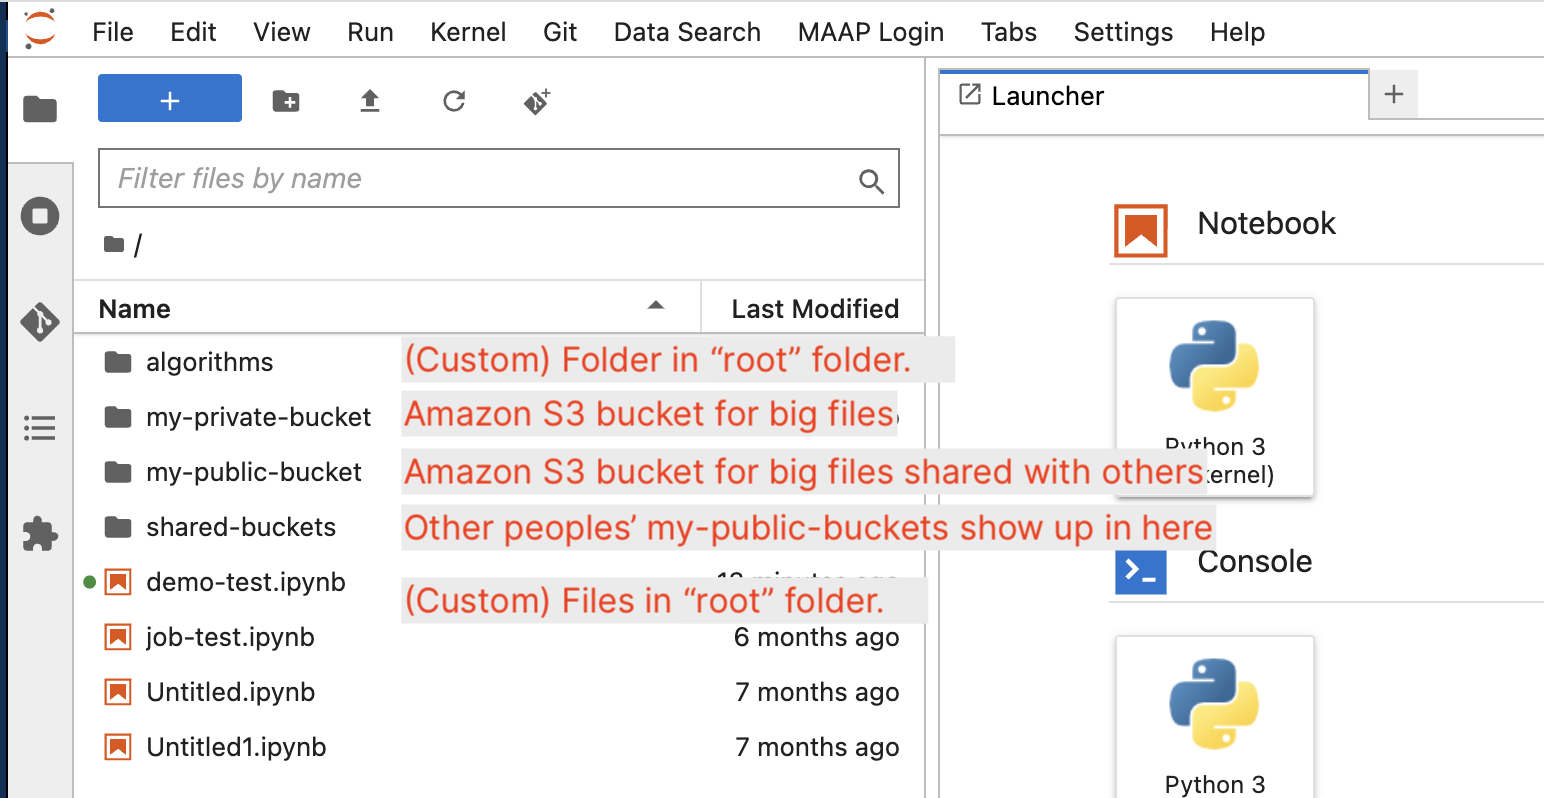
My root folder (fast cloud storage)
Your Jupyter home directory (
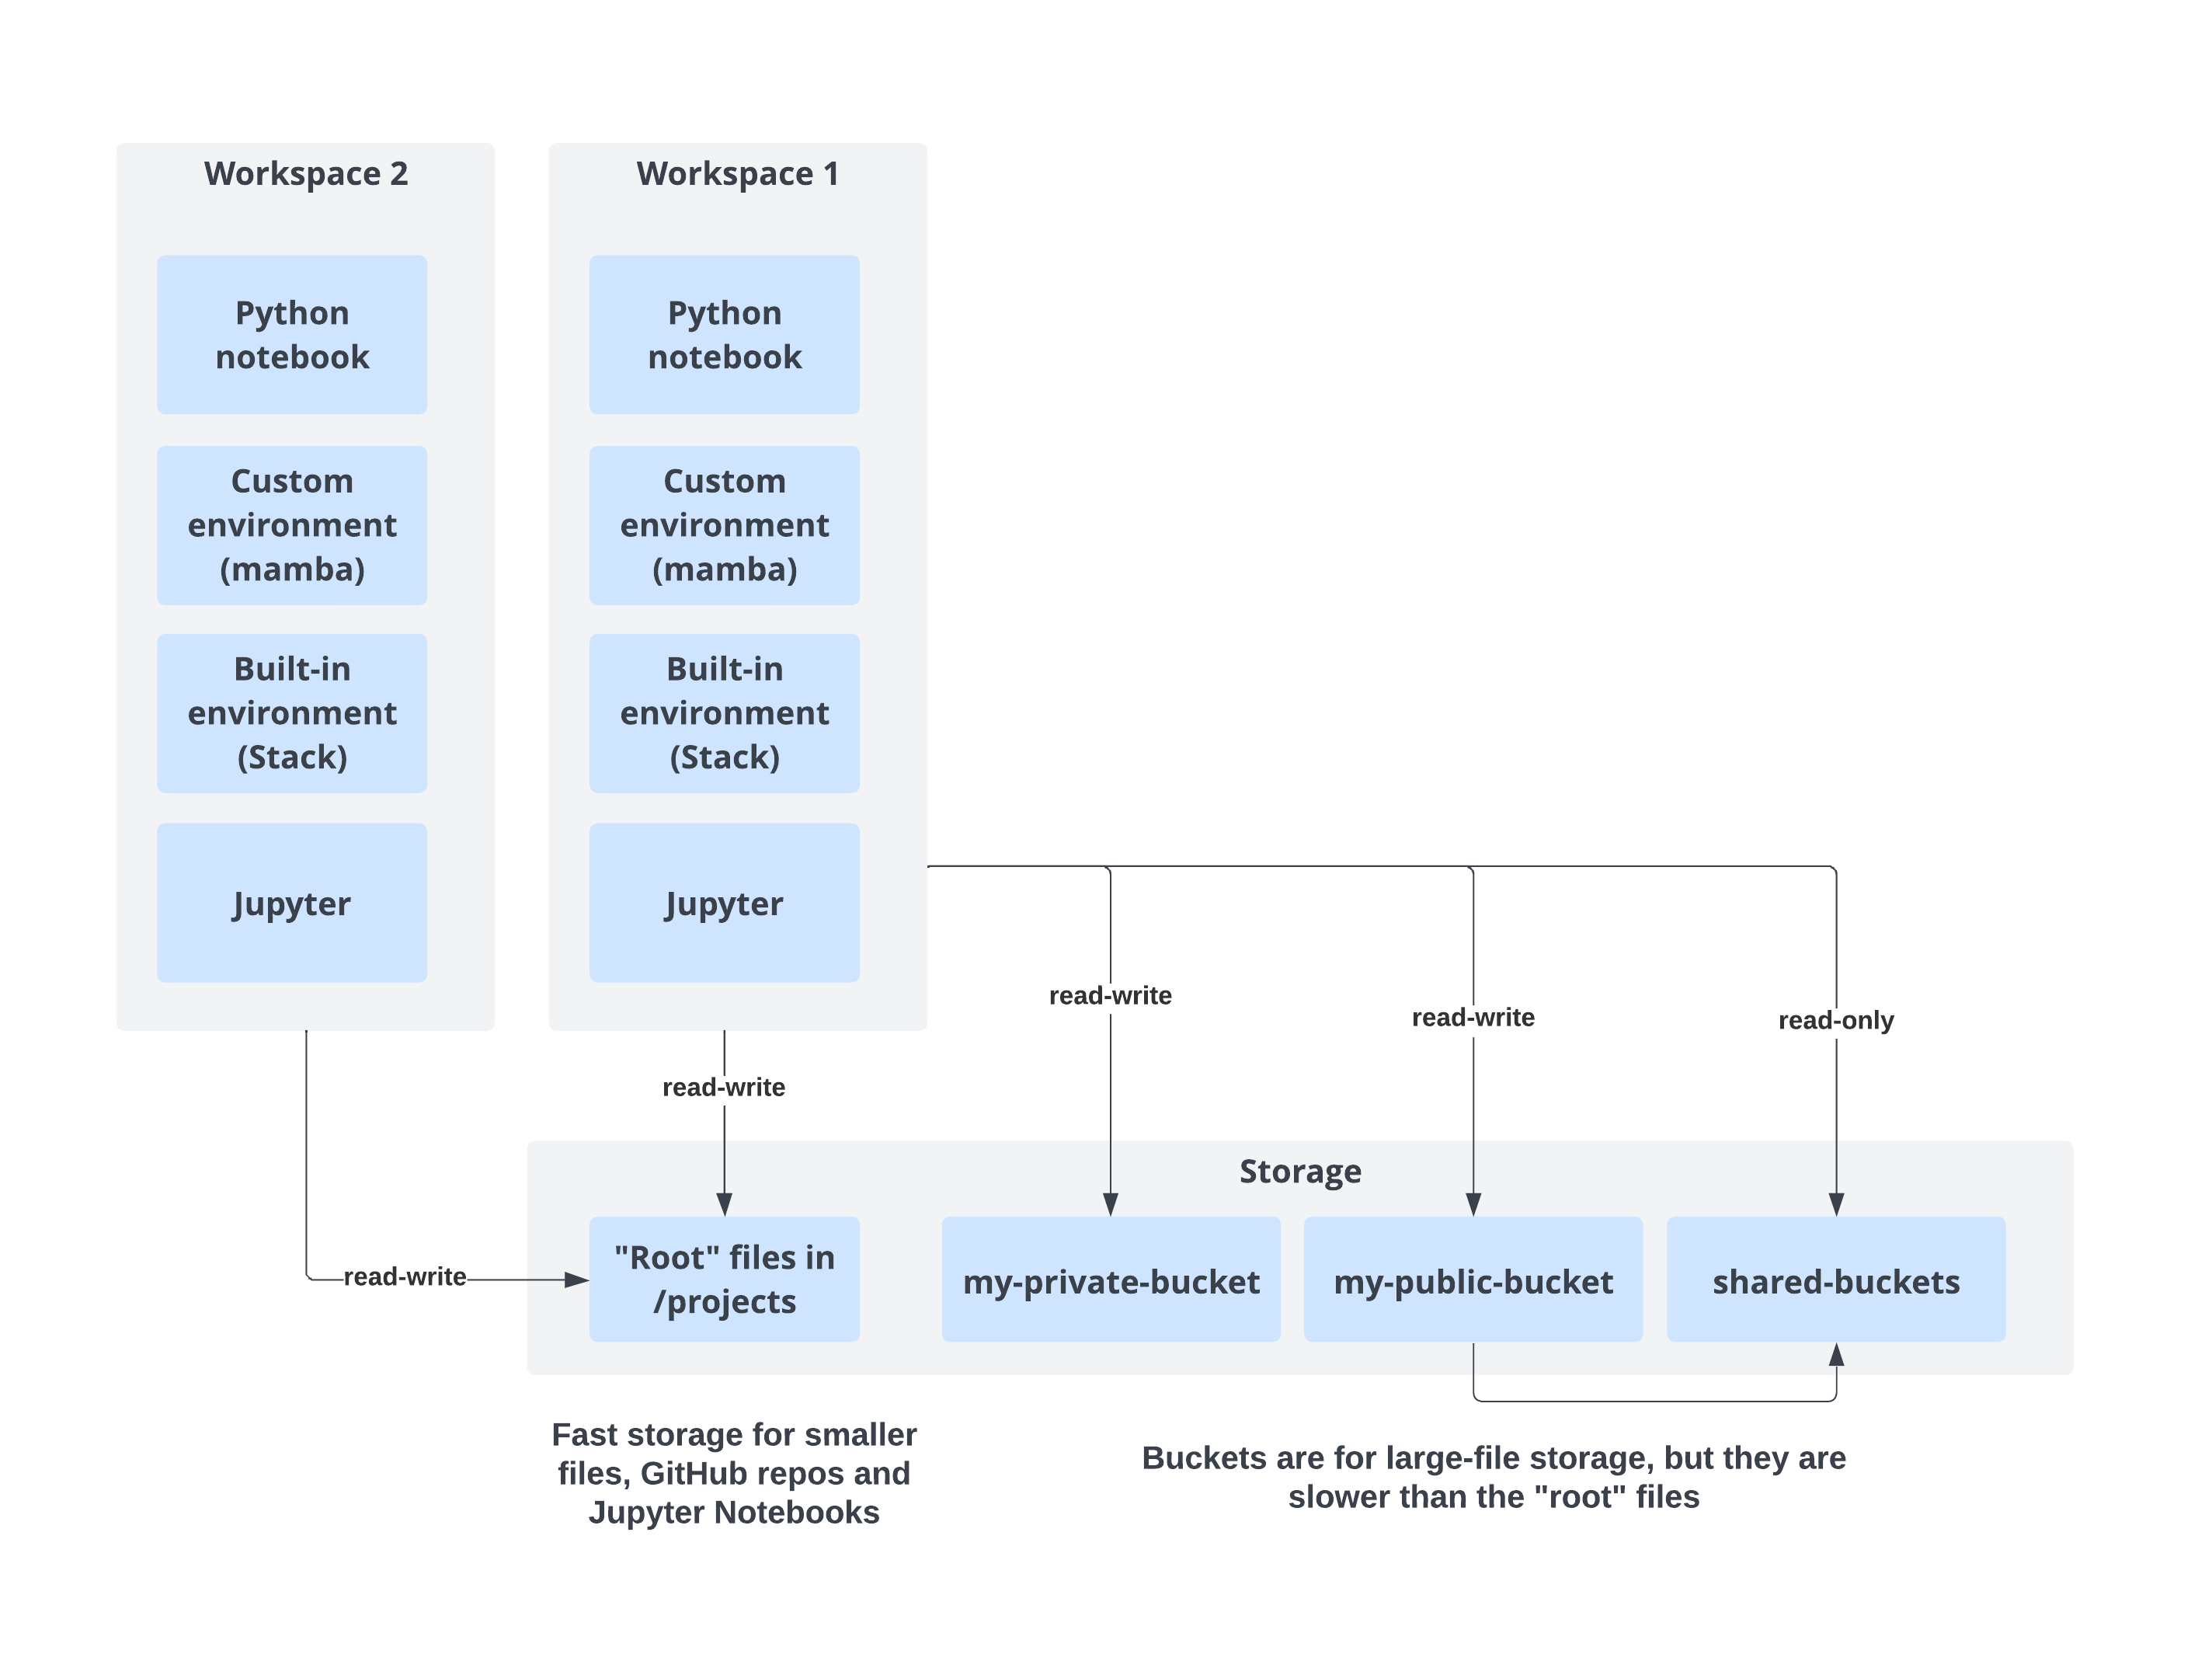
~) is mounted to/home/jovyan. Files in here persist across sessions and exist across your workspaces.Use this for code-related items, smaller data storage (such as Jupyter Notebooks, Python/ R/ Markdown files, etc.)
Git is more likely to behave predictably here compared to other storage
This is also the place to make persistent conda environments (covered in another section), but make sure to not make a conda env inside a git-tracked folder, or if you do add it to the .gitignore. If git is tracking an env, it could cause your workspace to crash.
Uses local (to Jupyter) file system; generally faster and more reliable for “normal” file operations, but expensive
Large file storage: my-private-bucket
~/my-private-bucket is an S3 bucket with persistent storage, but accessible only to you and others in a shared workspace.
Use for large data storage
It will be slower than the root folder to copy and move files, which is why it is not ideal for storing smaller files that need to be read or written quickly (e.g. Jupyter Notebooks)
Sharing files: my-public-bucket and shared-buckets
~/my-public-bucket is an S3 bucket with persistent storage. It is the same as ~/shared-buckets/<my_username>/ — anything you put in here will be accessible to other users via ~/shared-buckets/<my_username> as a read-only file. Likewise, to find shared files from another user, look in ~/shared-buckets/<their_username>.
Use for large data storage for files that you want to share across workspaces
Public and shared buckets are not recommended for Jupyter Notebooks
Mounting your MAAP workspace on your local computer
If you prefer to work on your local computer, or to drag-and-drop copy files from your computer to/from MAAP, you access the workspace via SSH. The process for doing this is in the system guide.