Running Algorithms at Scale
In order to run algorithms in the scaled-up cloud compute environment, they must first be “registered” in the Algorithm Catalog. This will make them available to other MAAP users, clearly define their inputs and outputs, and prepare them to be run easily in the Data Processing System (DPS).
A single execution of a registered Algorithm is called a Job. A single Job is easy to run using the Submit Job UI.
Batches of Jobs are run using a Jupyter notebook (often called a “control notebook” or “wrapper notebook”) and a Python library called maap.py that has helper-functions to execute and monitor Job execution.
Running Jobs can be monitored via the View Jobs UI and/or the maap.py helper functions. 
Register an Algorithm
To register an Algorithm that can be run in the DPS, the code should be placed in a public Git repo (either Github or Gitlab).
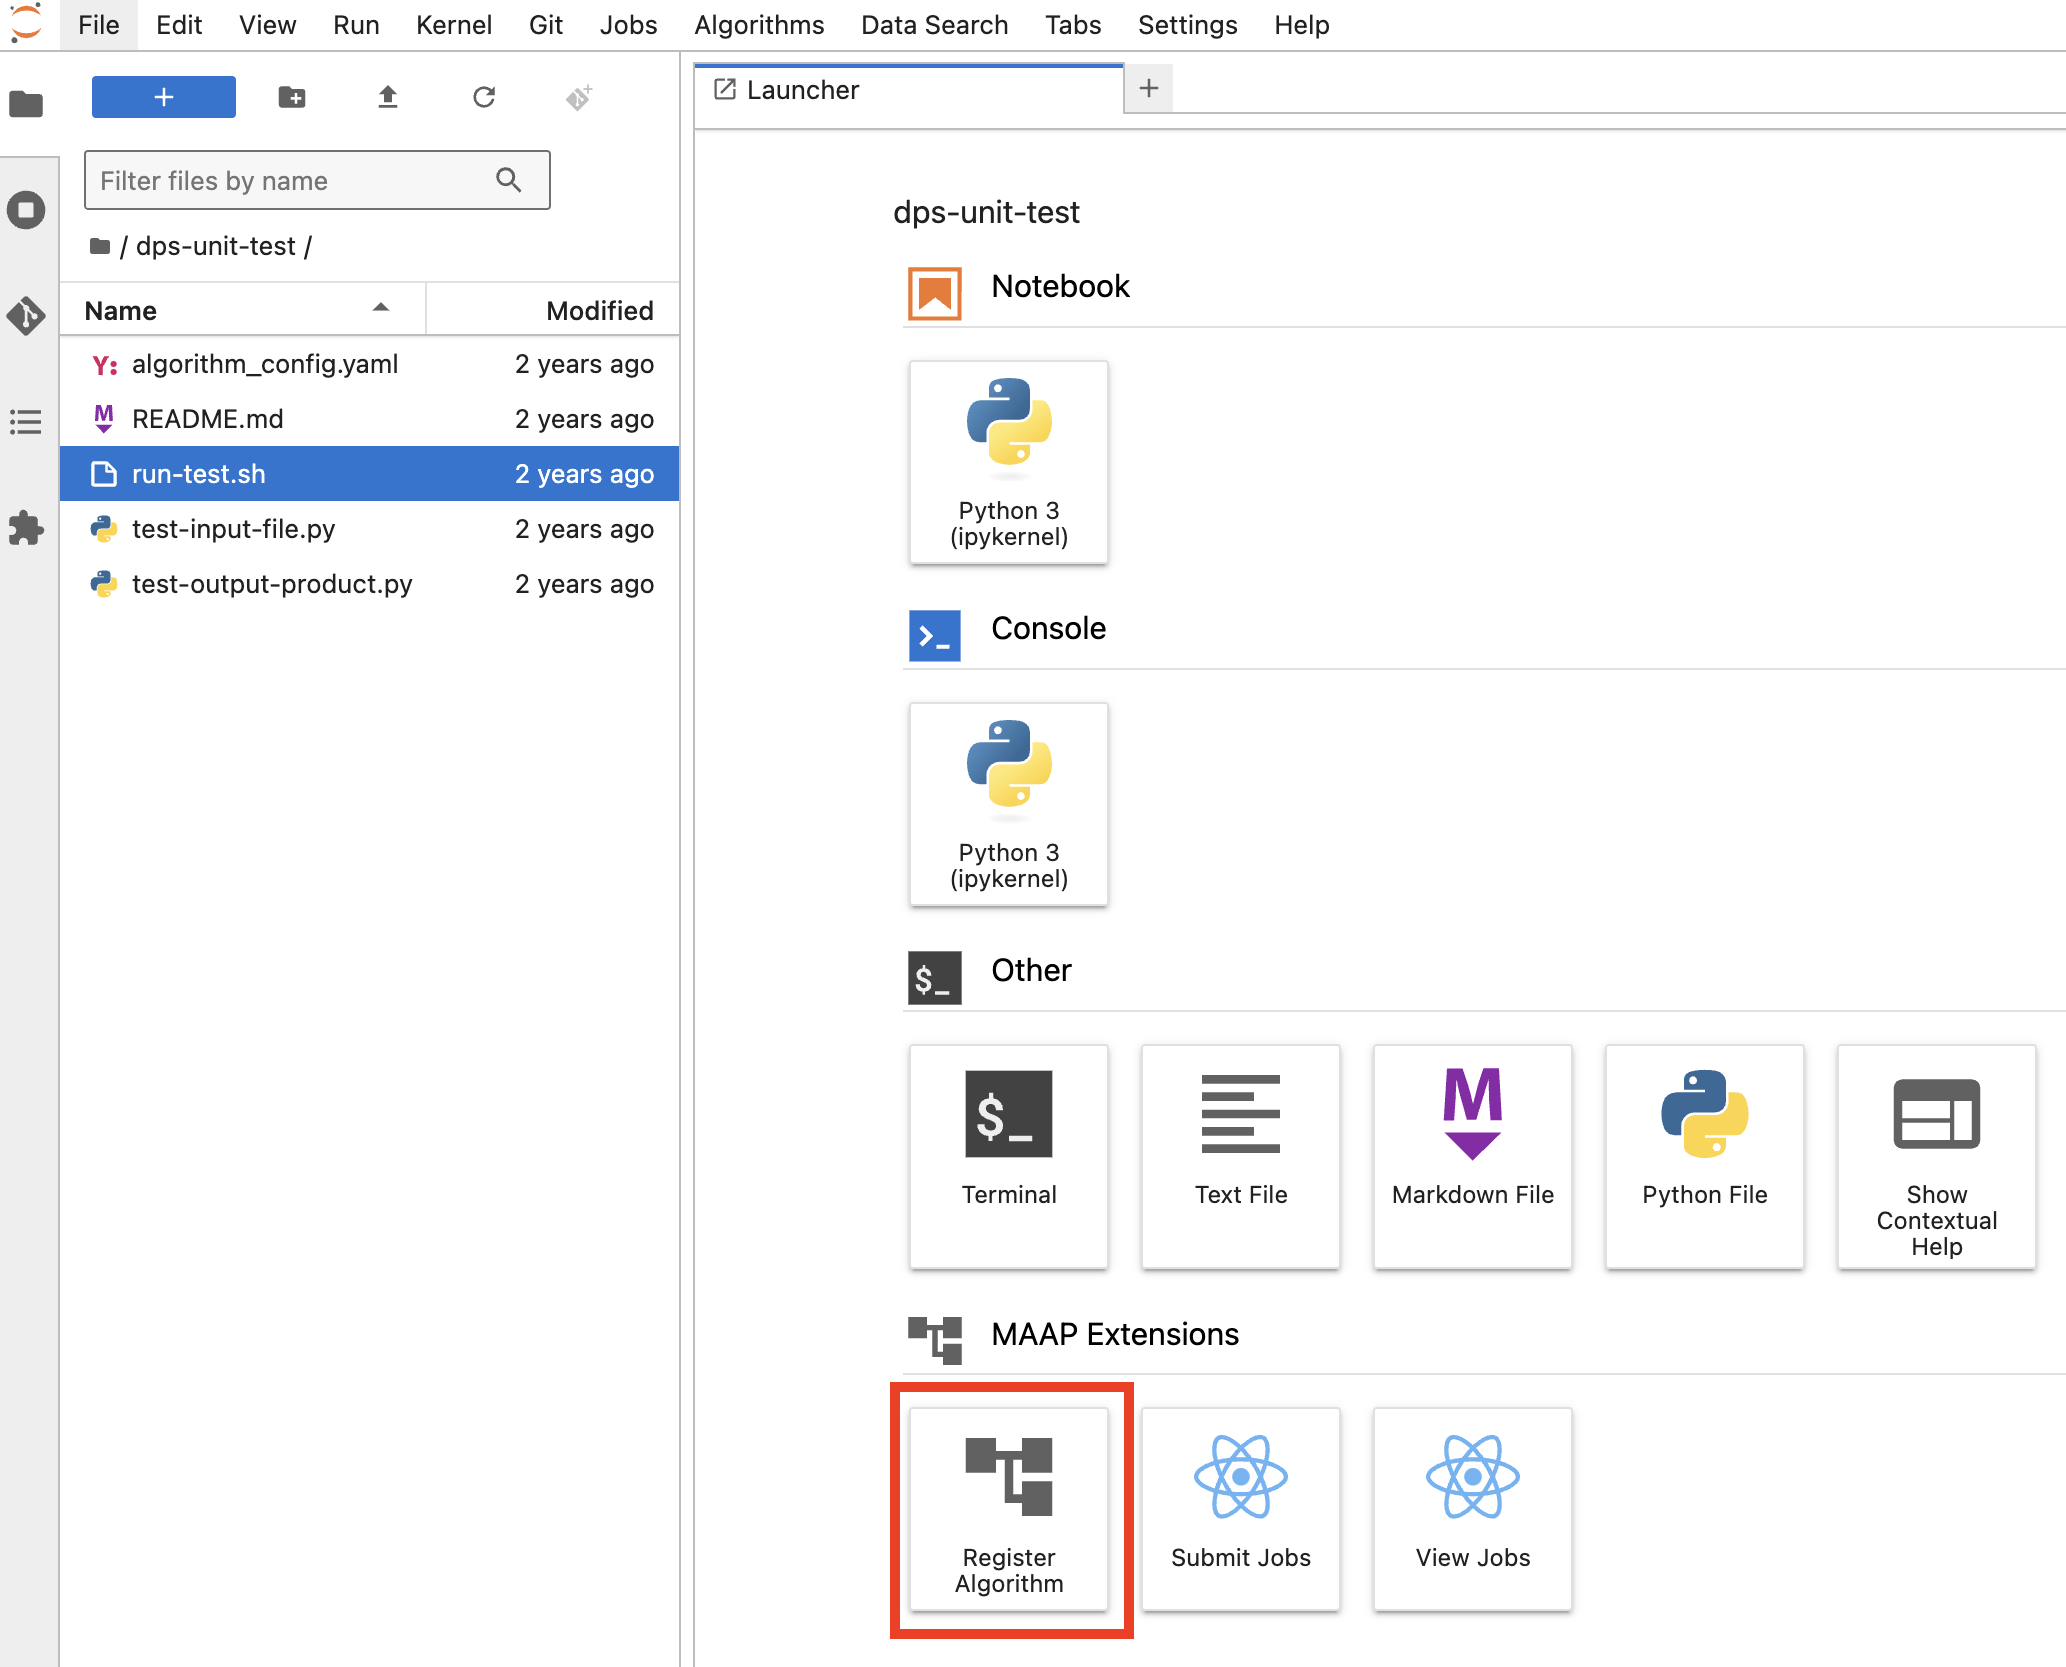
Open the Register Algorithm tool in the MAAP Extensions section of the Launcher. To open the Launcher, choose File -> New Launcher, or press the blue “+” button above the Jupyter file browser.
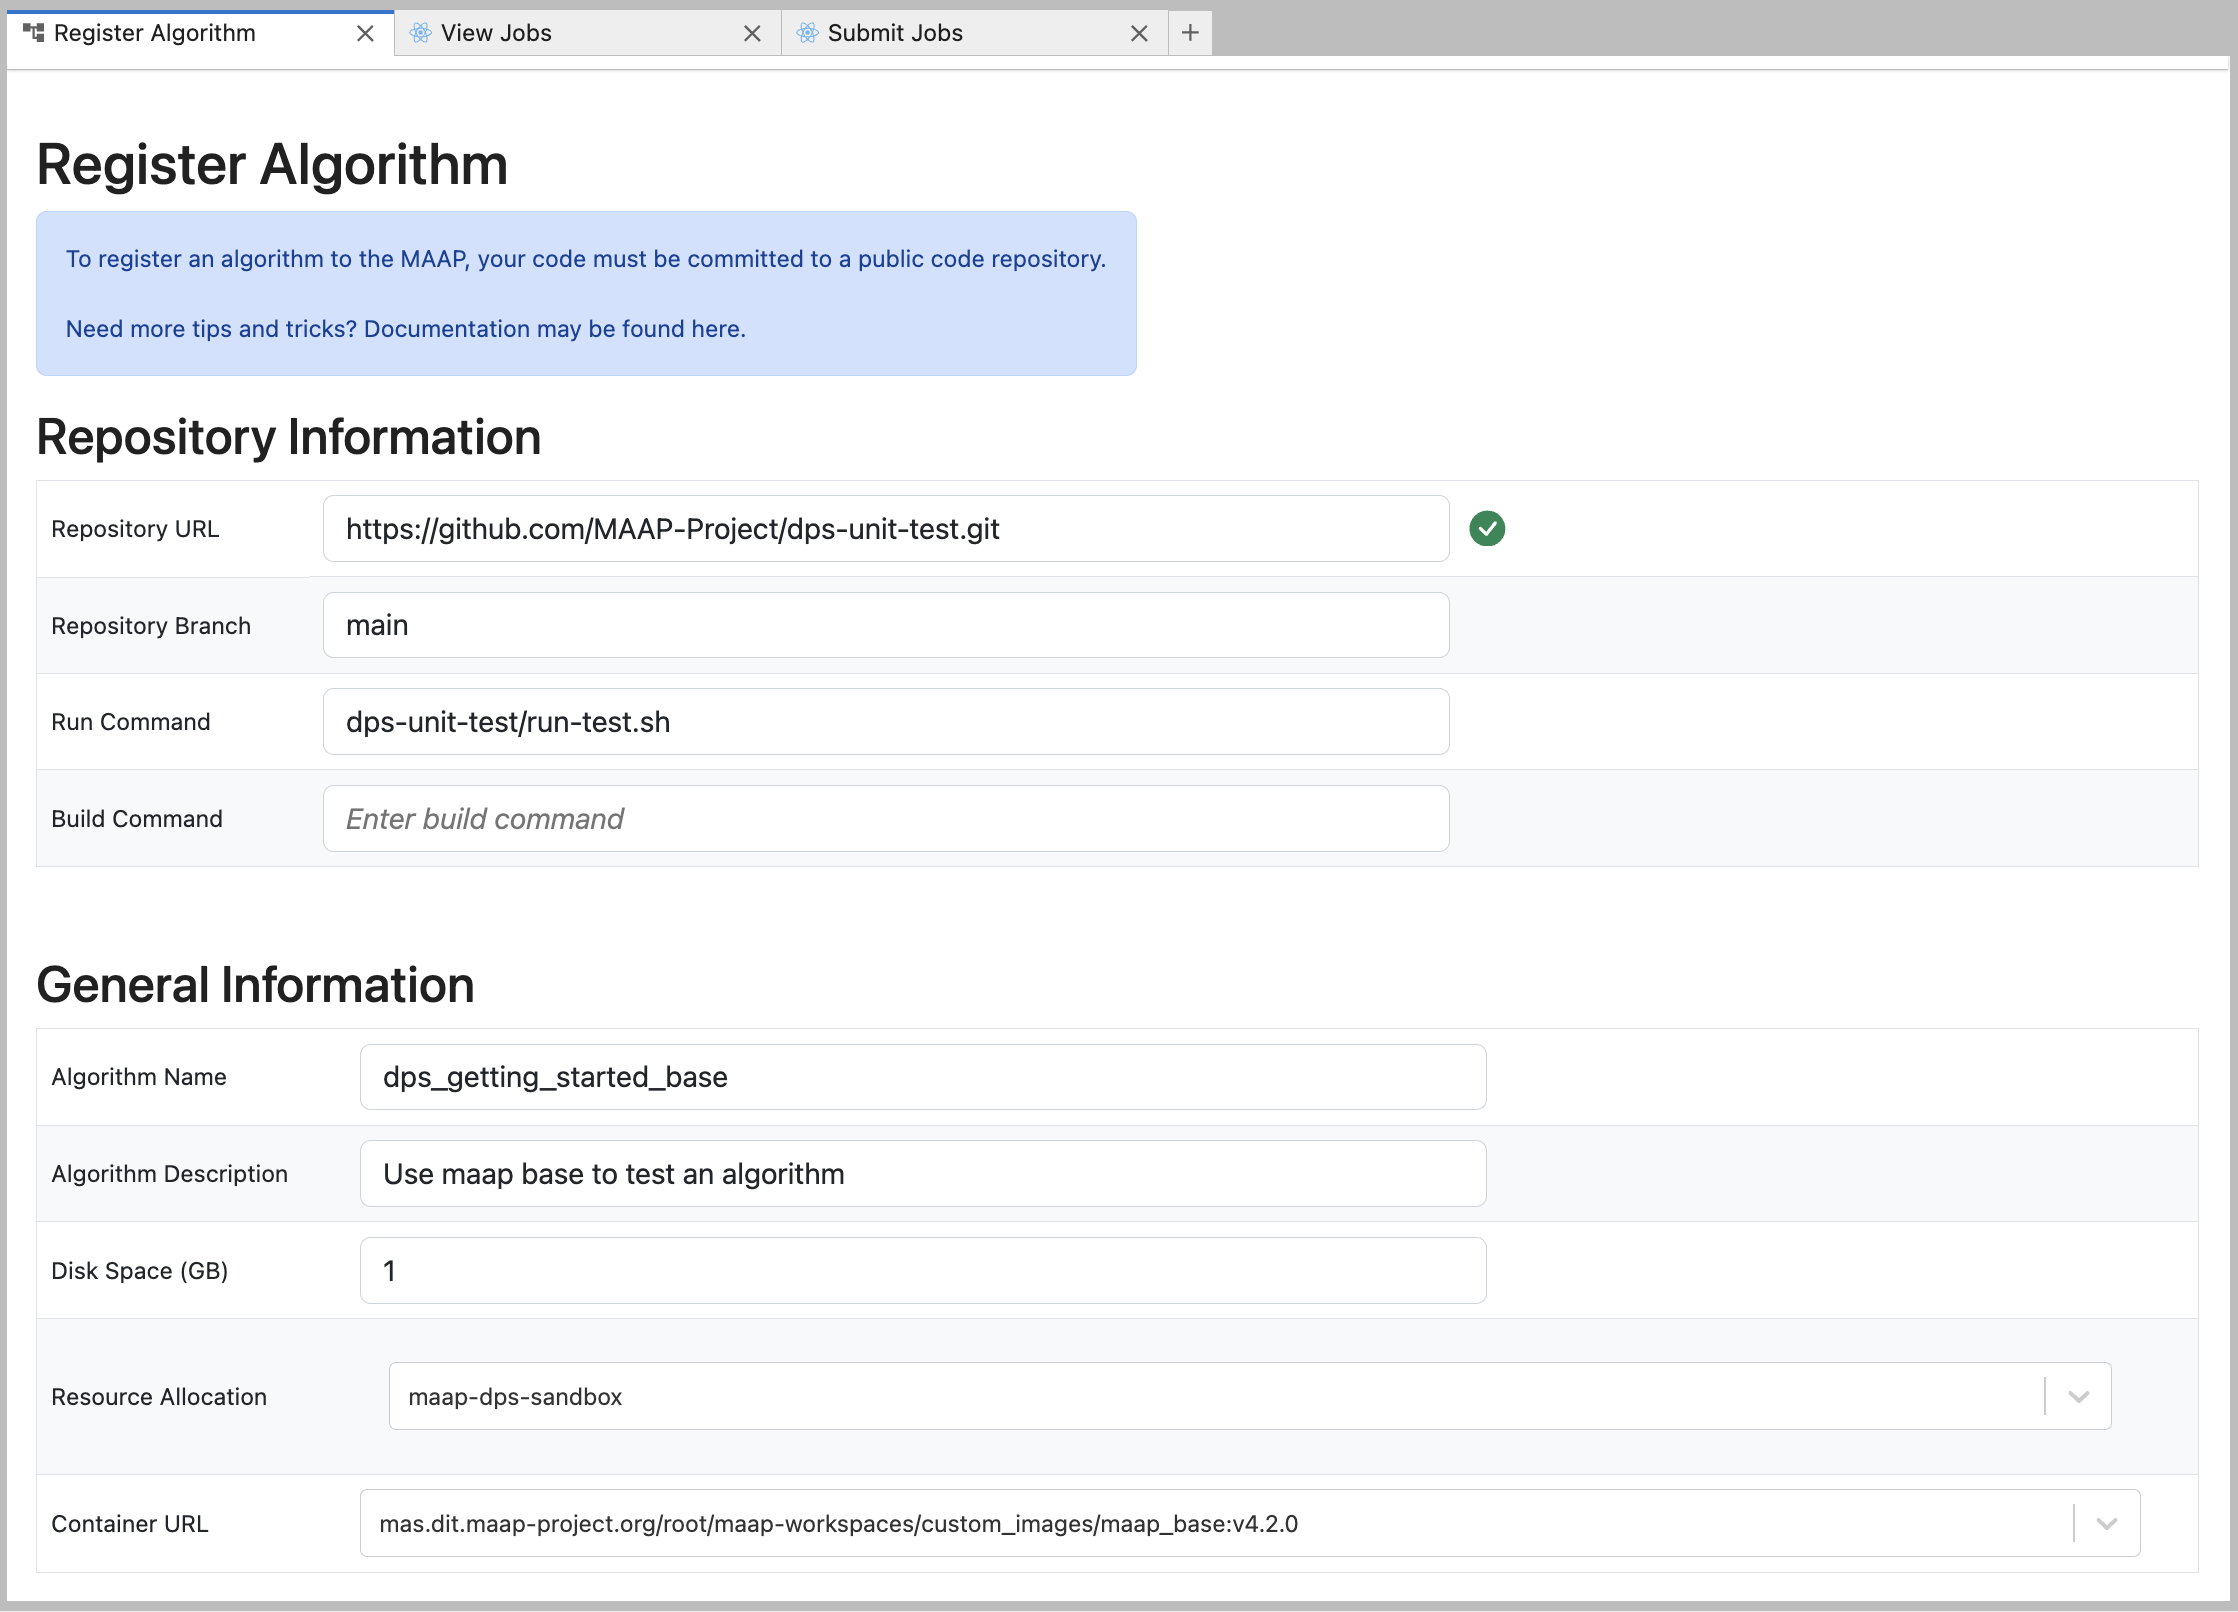
First you fill in the public code “Repository Information”.
The Repository URL is the .git URL.
https://github.com/MAAP-Project/dps-unit-test.git
Repository Branch is used as a version when this algorithm is registered.
main
The Run and Build Commands must be the path of the scripts that will be used by the DPS to build and execute the algorithm. Typically these will be the repository_name/script_name.sh, as demonstrated in this screenshot:
dps-unit-test/run-test.sh
For this algorithm, there is no build script, so the Build Command may be left empty.

Once that is complete we enter some “General Information”.
The Algorithm Name will be the unique identifier for the algorithm in the MAAP system; for example, it is the label that you look for when running or monitoring a Job. It can be anything you would like. If you use the same name as an existing Algorithm, you will replace the existing Algorithm in the system with your new one.
Algorithm Description is additional free-form text to describe what this algorithm does.
Disk Space is the minimum amount of space (in GB) you expect—including all inputs, scratch, and outputs—it gives the DPS an approximation to help optimize the run. For this tutorial we can just put
1.Resource Allocation tells the system what kind of cloud computer to use for a Job run with this Algorithm. Typically you will use
maap-dps-worker-and the last number indicates the amount of RAM. In the example shown here, we choose the smallest amount of RAM because we have a very simple Algorithm,maap-dps-worker-8gb. The options available to you are based on your MAAP organization membership. Guest accounts will only be able to use themaap-dps-sandbox.The Container URL is a URL of the Stack (workspace image environment) you are using as a base for the algorithm. This is a dropdown where the default is a standard minimal container called
maap_baseimage such asmas.maap-project.org/root/maap-workspaces/custom_images/maap_base:v4.2.0. The other option is the Container of your current workspace (i.e. R, pangeo, etc.). These containers will have numerous conda packages installed which may or may not be useful for you. Just a note if you want the default conda packages for your current workspace container, if you successfully ran the Algorithm in a Terminal without adding additional packages, then you should be able to successfully use your current workspace container as the Container URL for your algorithm. We recommend usingmaap_baseas it makes algorithm registration faster, although using it means you need to manage your own conda packages. More information how to make a custom conda environment here. See the Algorithm Registration documentation for more information on Containers.
mas.maap-project.org/root/maap-workspaces/custom_images/maap_base:v4.2.0
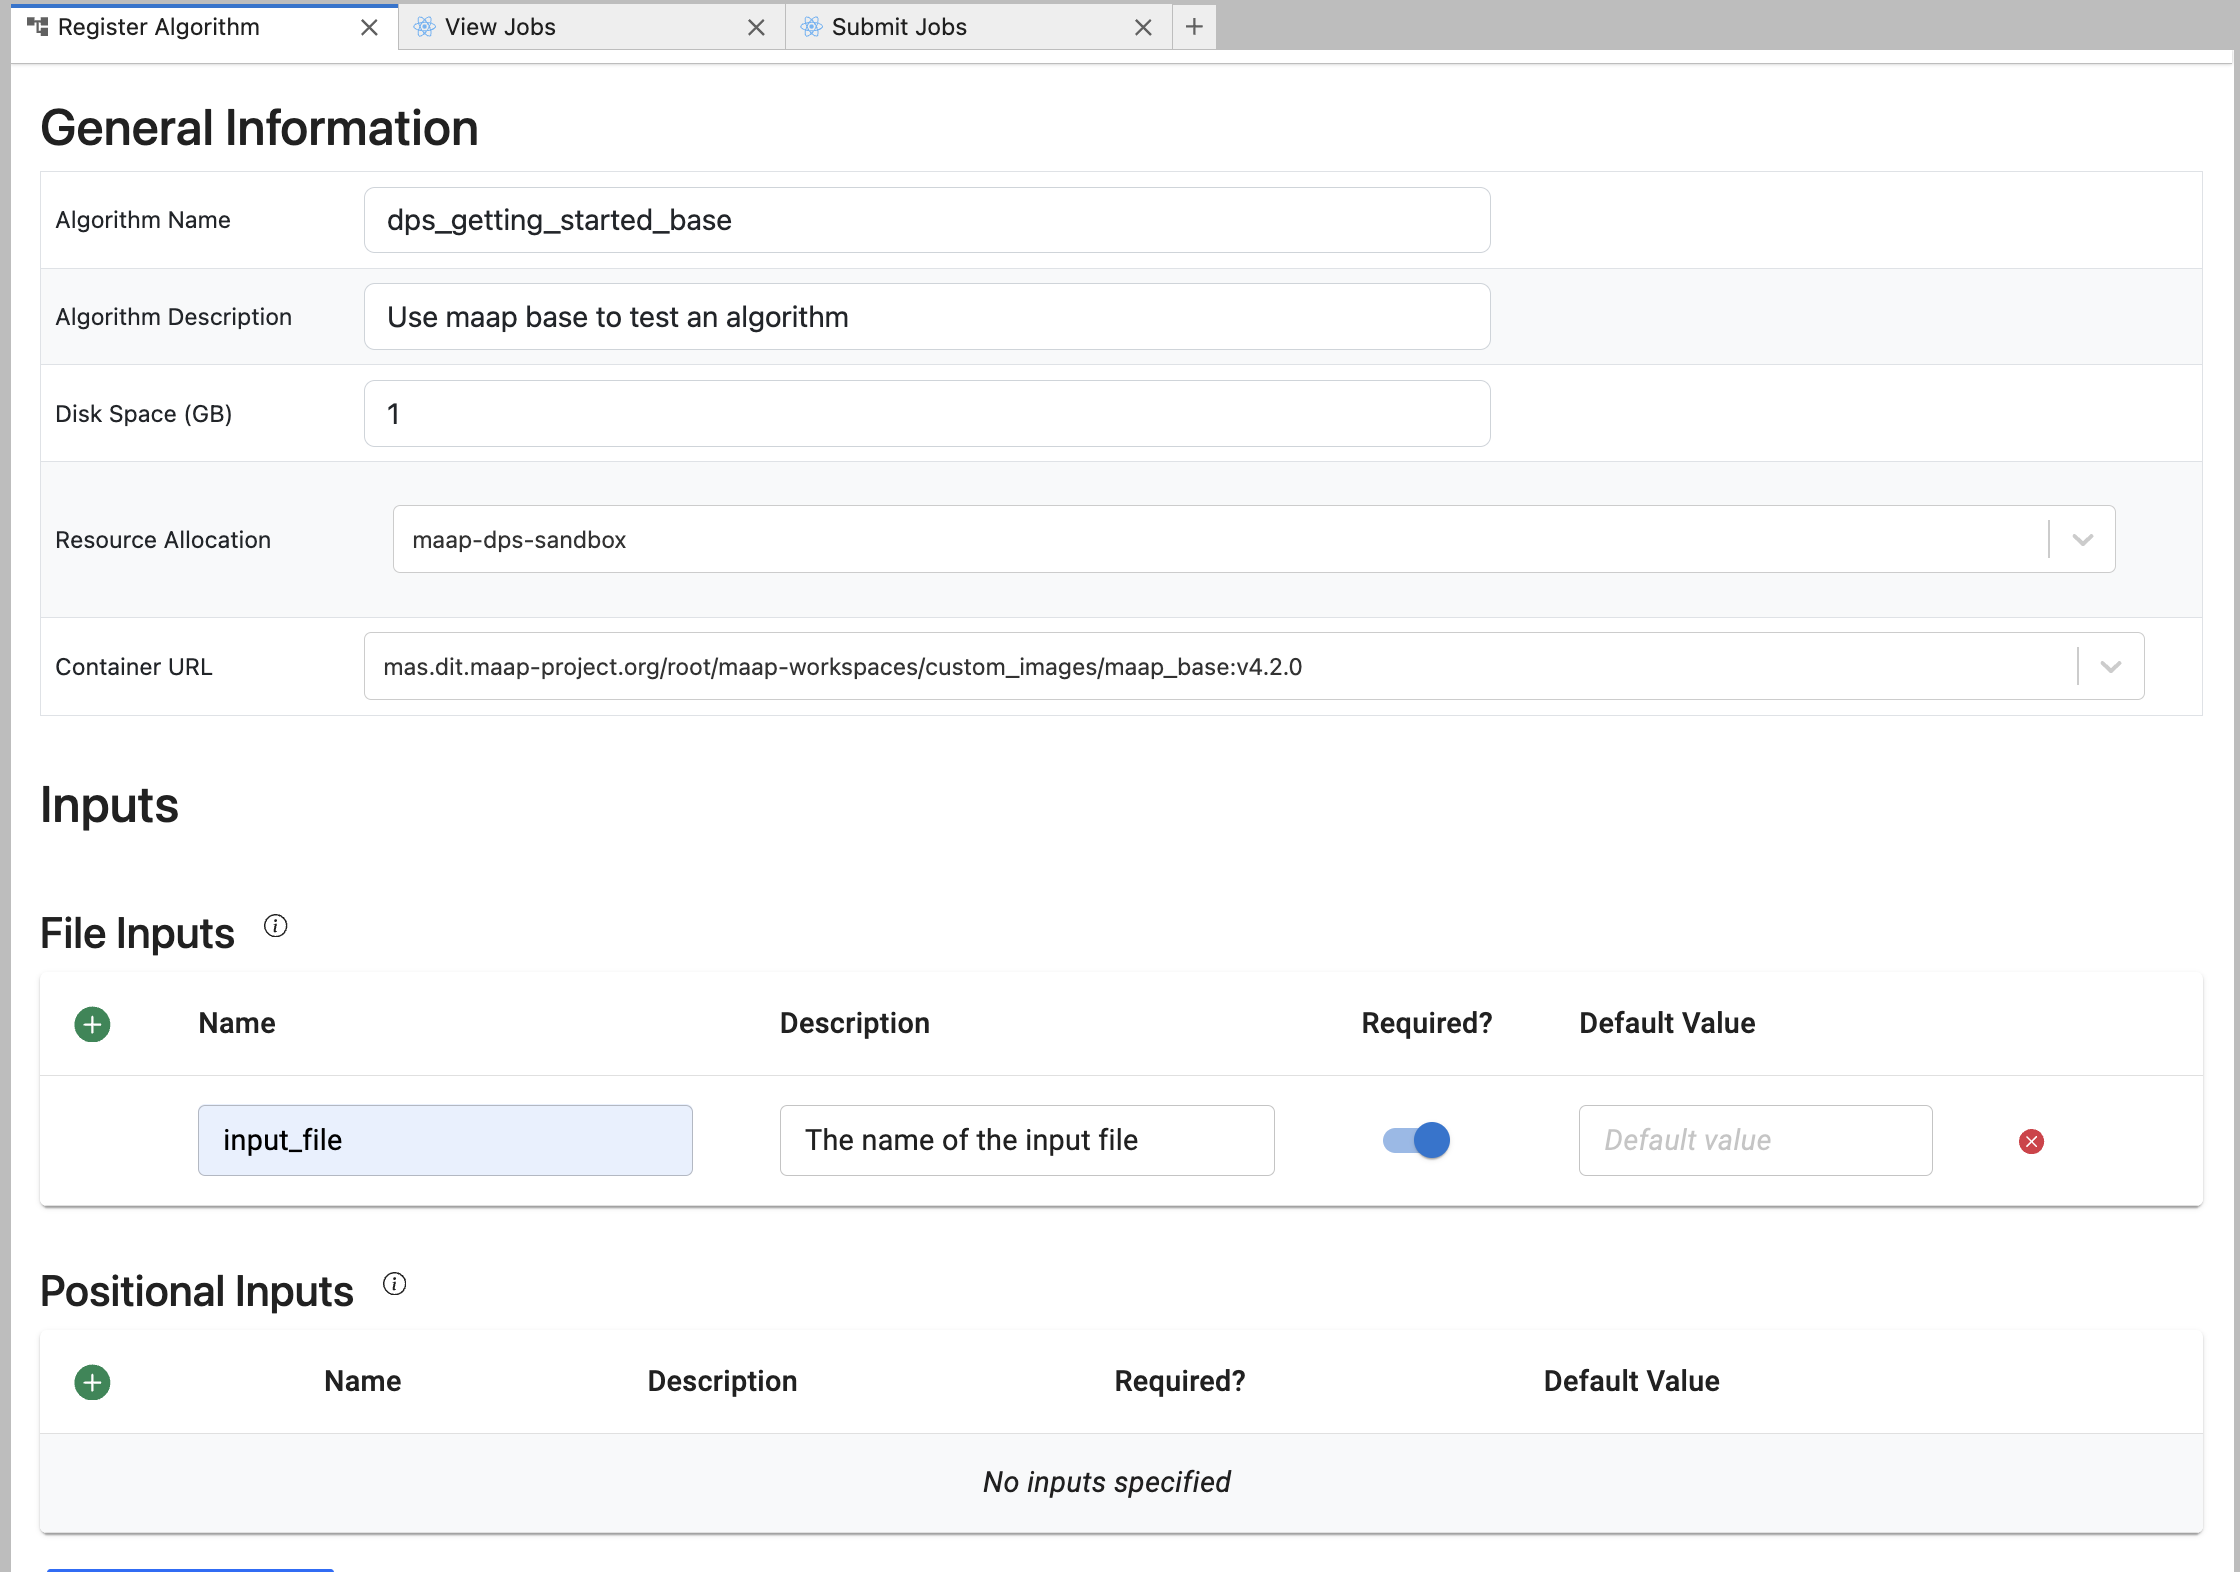
Fill in the Input section. There are File Inputs and Positional Inputs (i.e., command-line arguments). In our example we have on File Input called
input_file. For each input you can add a Description, a Default Value, and mark whether it’s required or optional. There are no positional inputs for this Algorithm.
Note
Understanding How the Algorithm Registration Form Relates to Job Execution in DPS: When you run a Job in the DPS, the MAAP system will start up a “worker” computer in the cloud based on the Resource Allocation parameter. It will then run the build script to make sure that your runtime environment is set up properly, and then the run script indicated during the registration process to handle the input parameters and run the algorithm code.
Note
As part of execution, the DPS will create a directory called /inputs. Copies of the File Inputs are placed into /inputs in the working directory of your job. A directory called /outputs is also created, to store any file outputs.
When it looks good, press Register Algorithm at the bottom of the page. A few seconds later you should see a modal dialog with a link to the algorithm registration process.
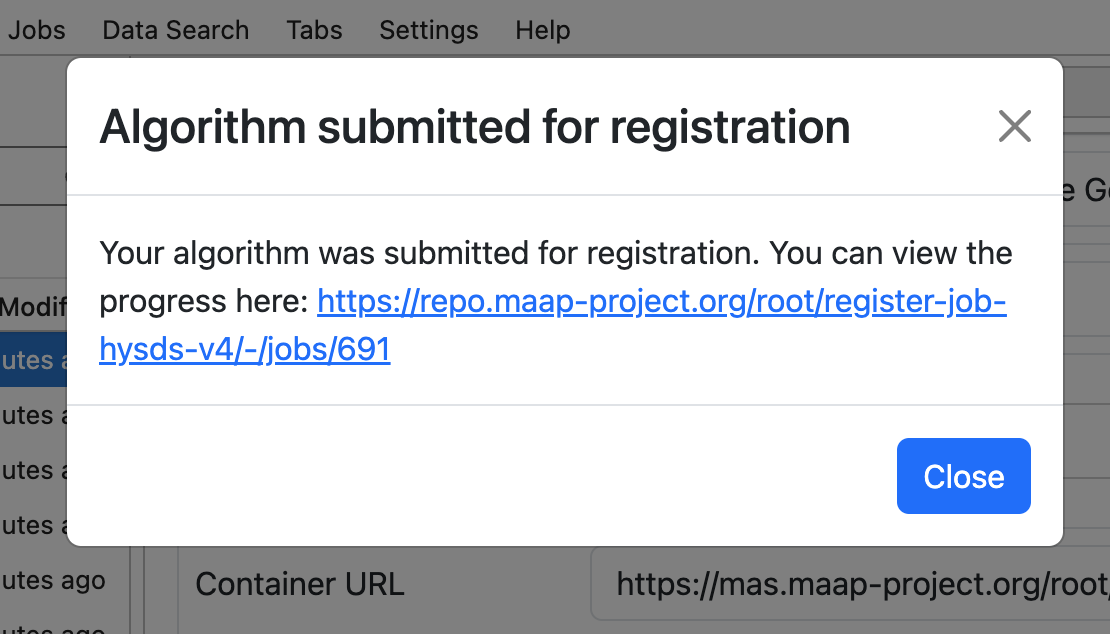
If you open that link in a new page or tab, you can monitor the progress of registration and see any error messages. By opening it in a new tab/window you can keep the Register Algorithm tool open and re-submit with the same values to correct any errors.
Here is an example error message: 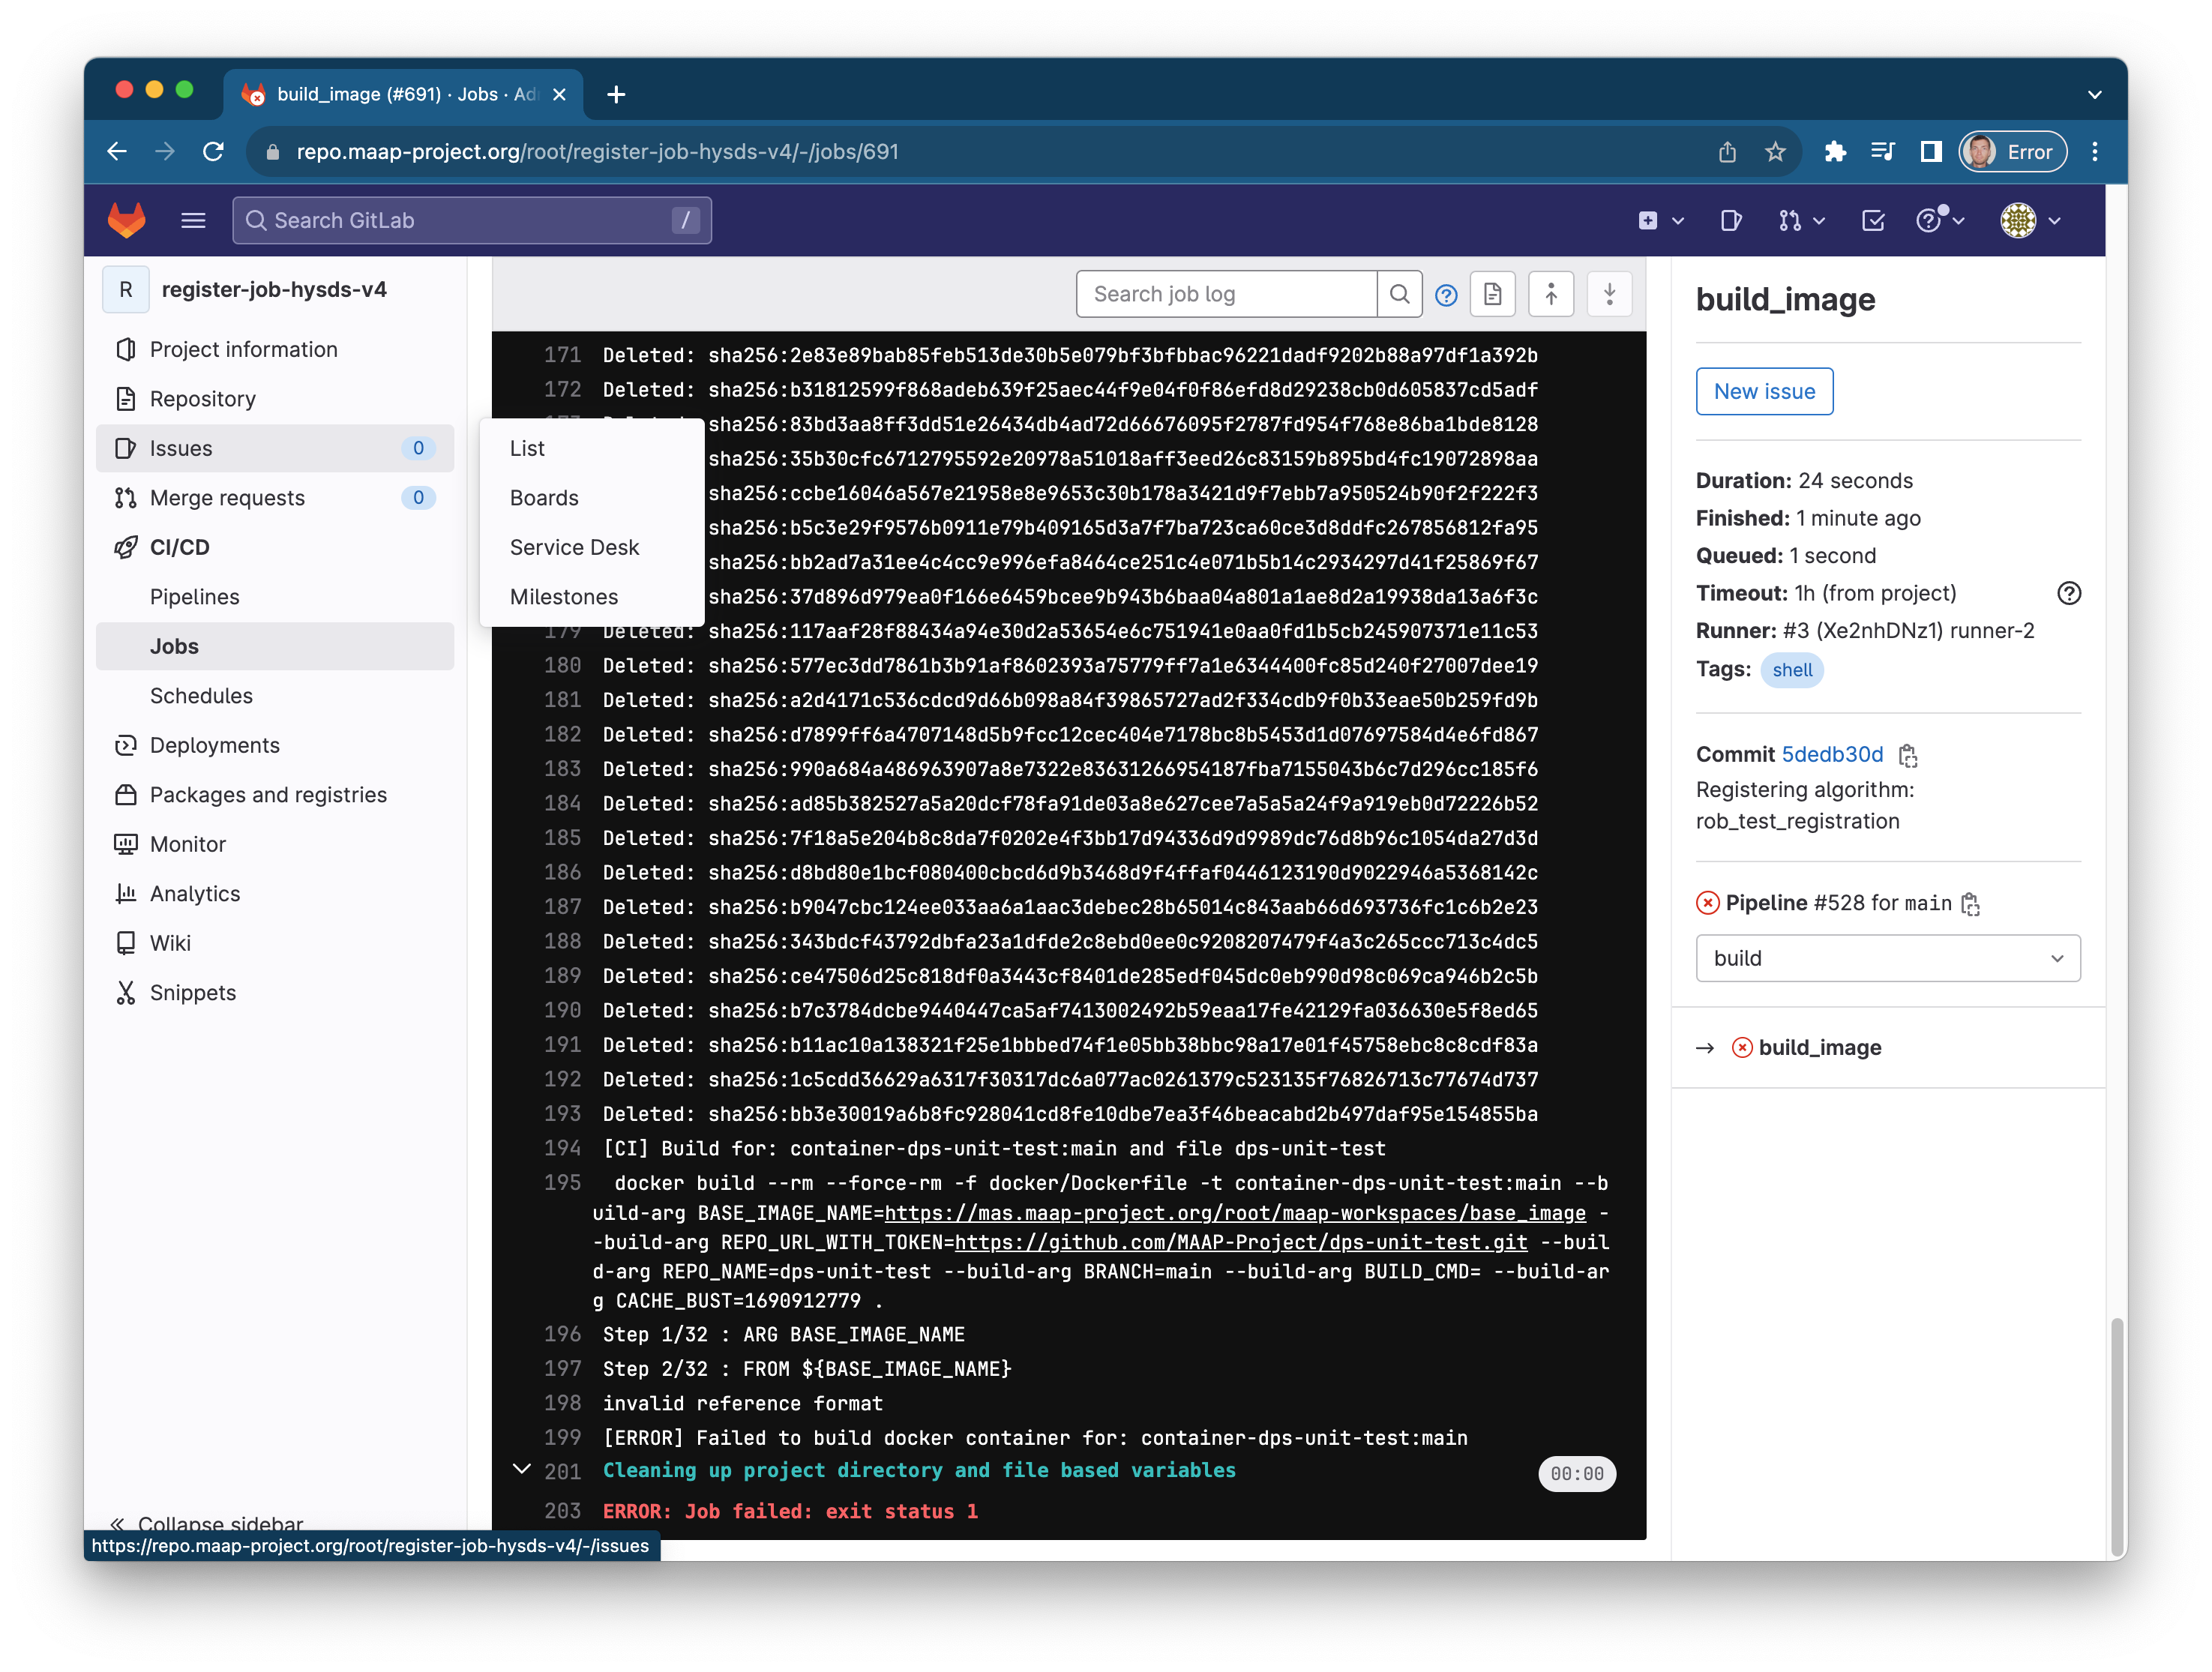
If the process continues without failing (this may take some time) you will ultimately see “Job succeeded”: 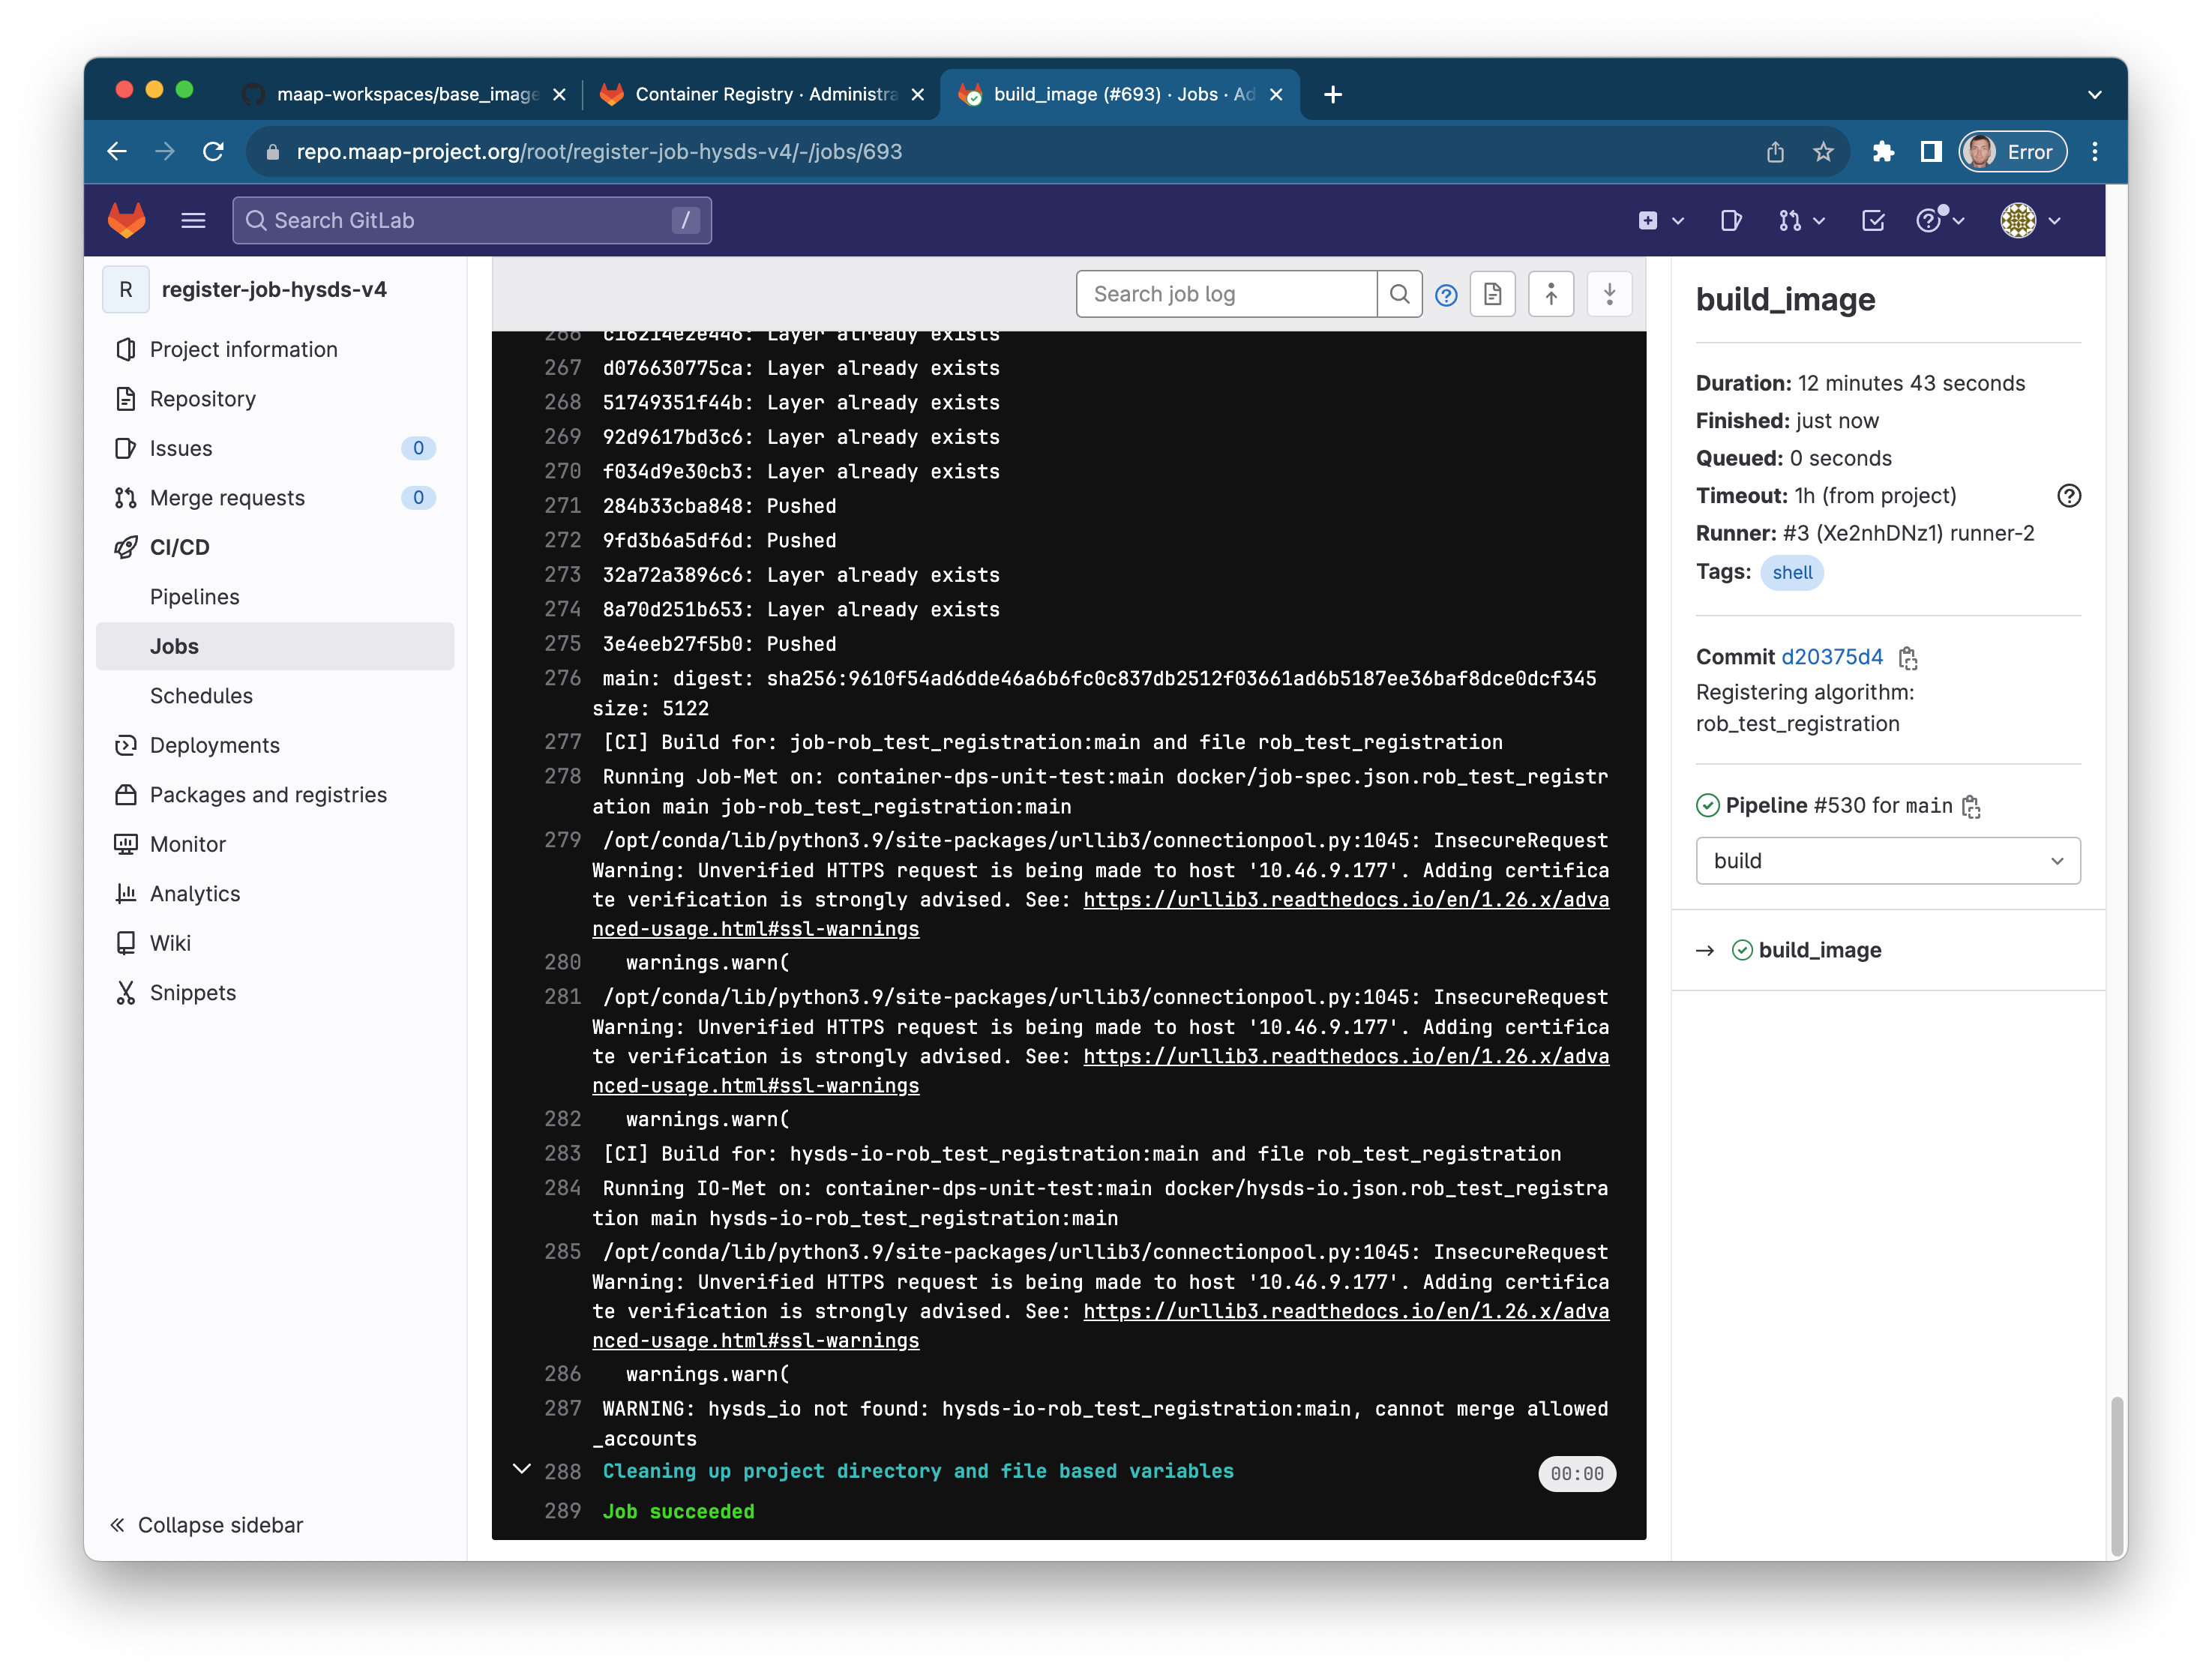
At this point you have successfully registered your Algorithm, and it is ready to be run in the DPS.
Run the Algorithm as a Job and Monitor it
Using The Jobs UI
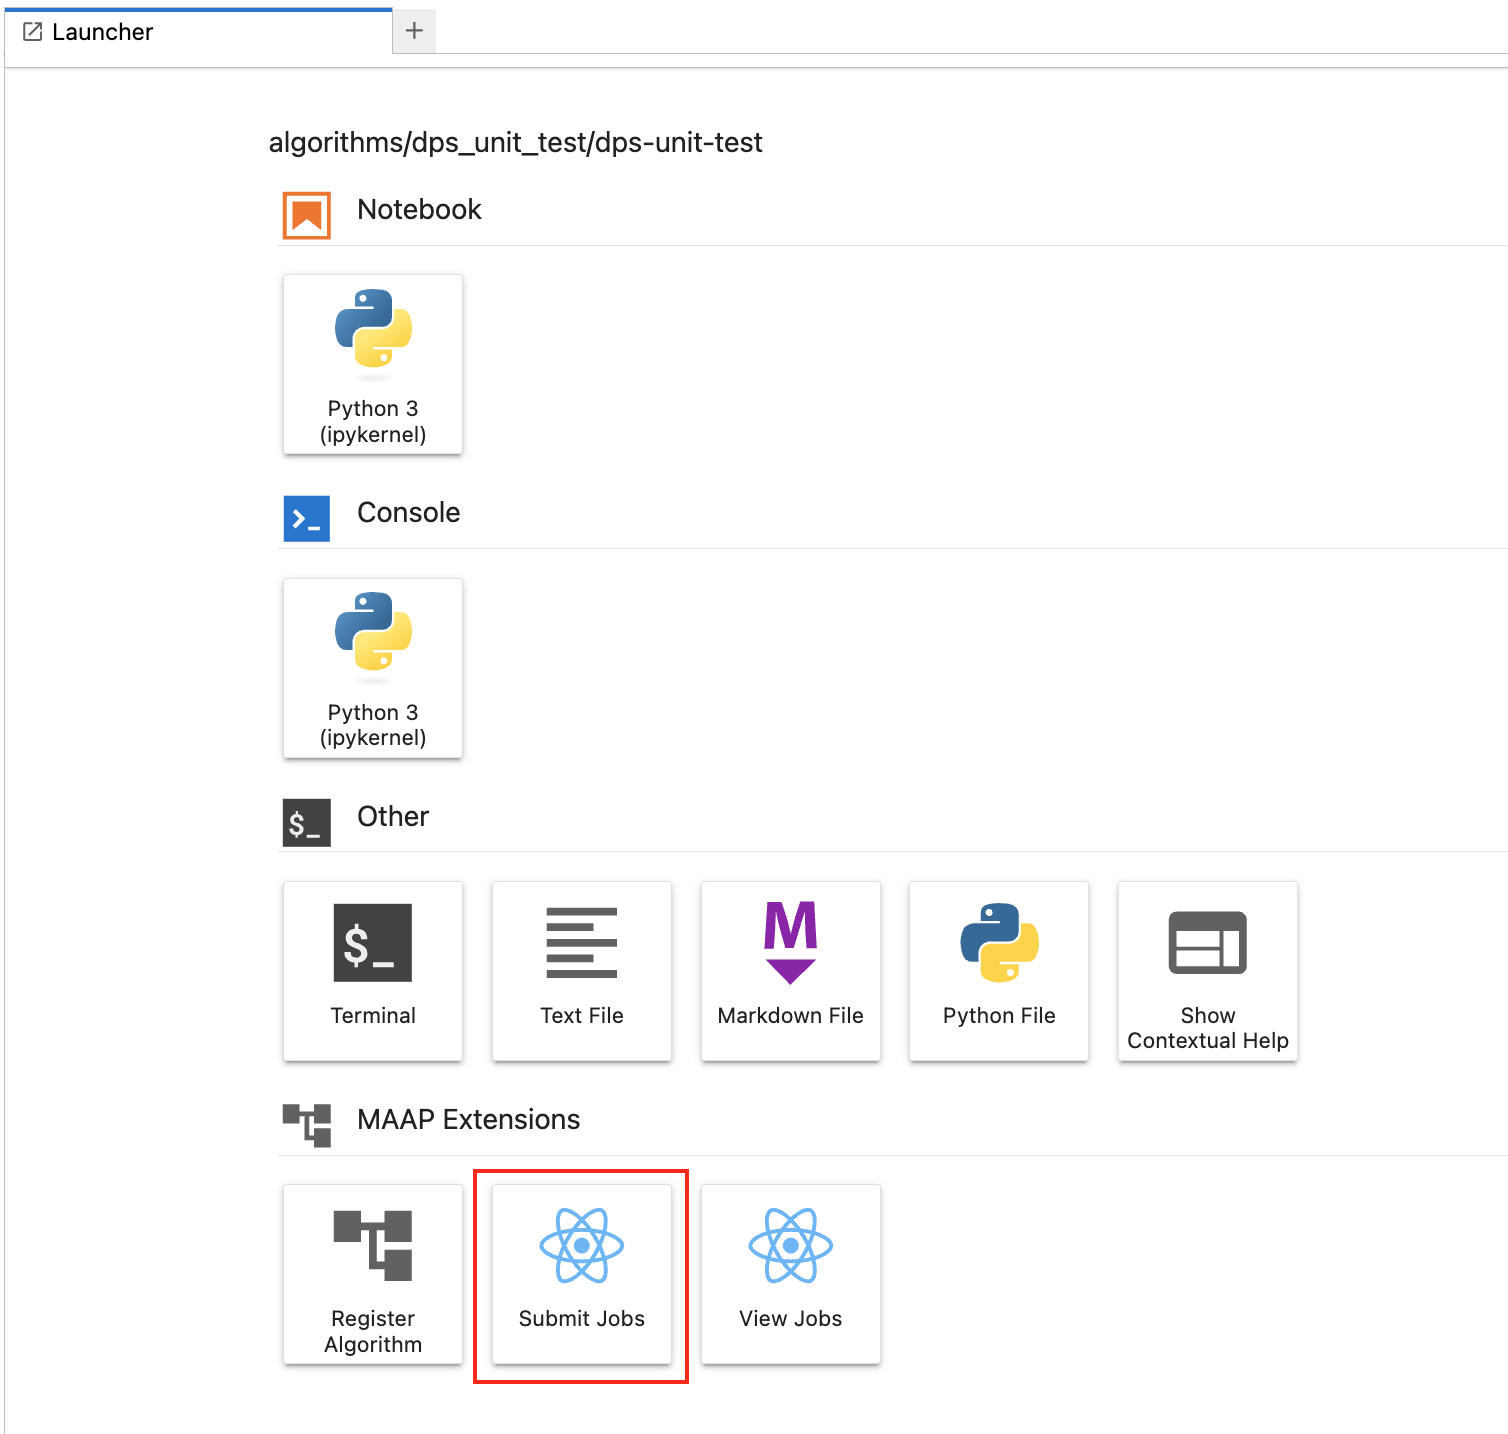
MAAP is configured to run up to 4,000 concurrent jobs. There are two ways to run a Job: via the Submit Jobs UI in the Launcher, or via a call to the maap-py Python library.
The Submit Jobs UI will let you run and monitor jobs easily. Open it up. You can find full documentation in the system reference guide for the Jobs UI in the System Reference Guide FAQs.
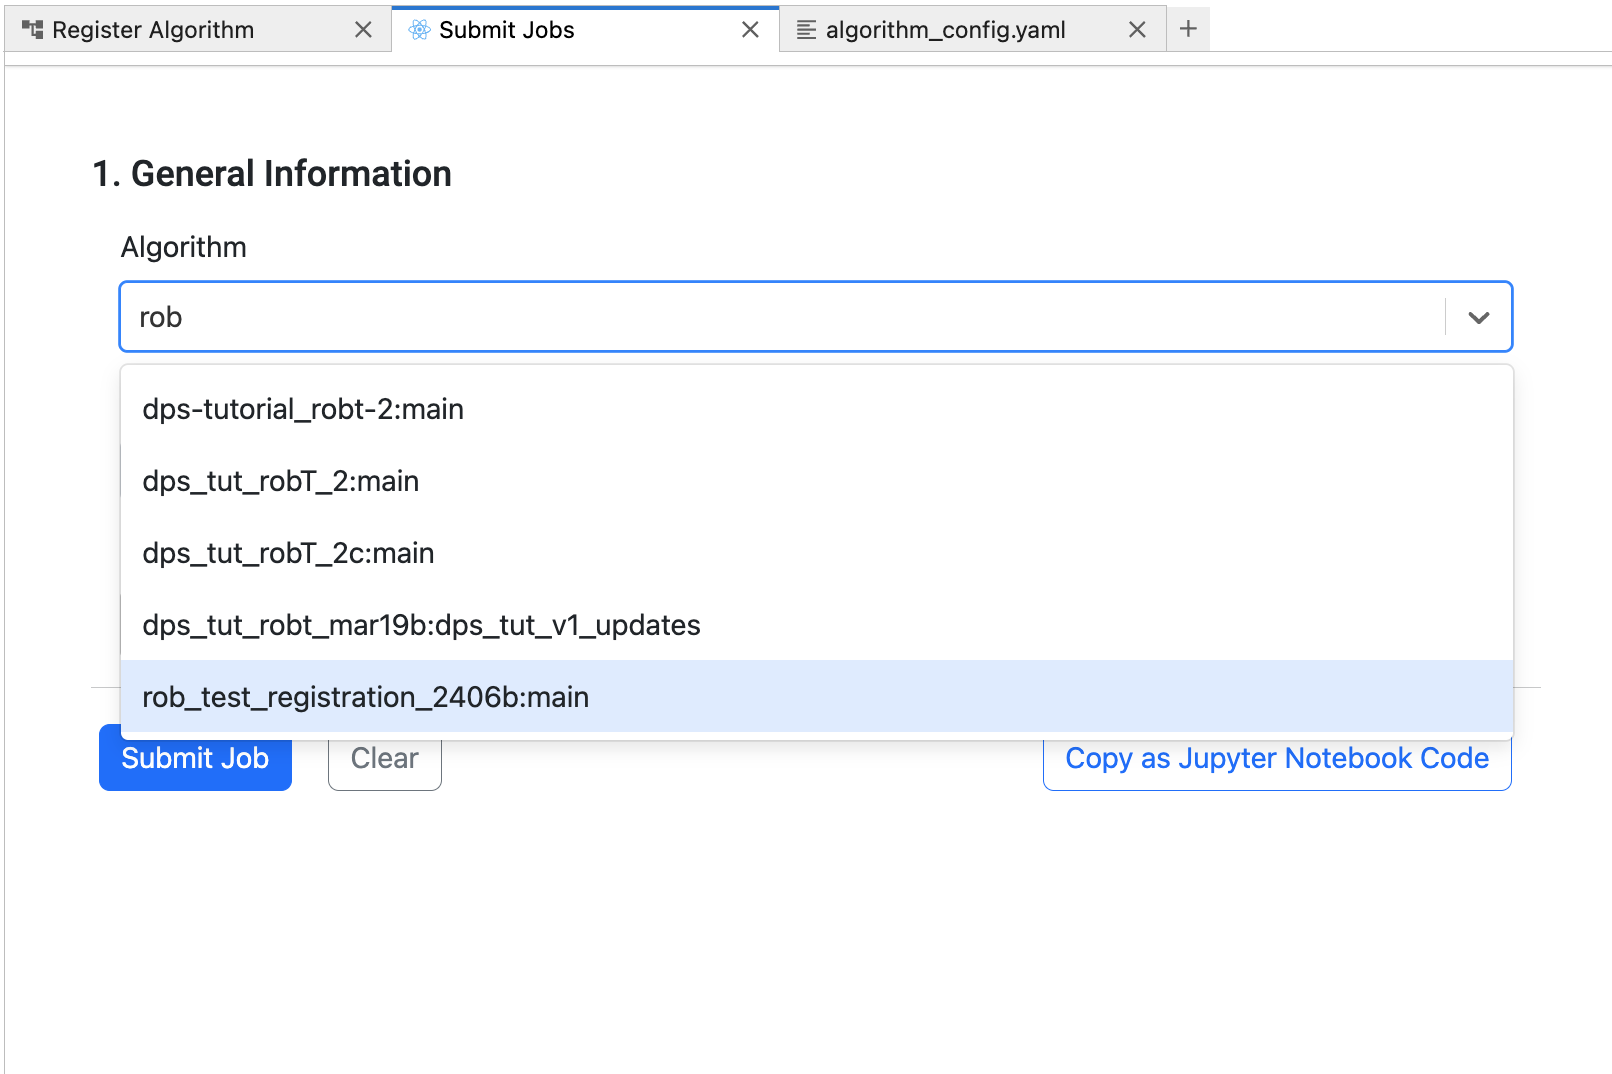
You can run your newly-registered Algorithm here. You will see it in the Submit Jobs tool in the Algorithm drop-down menu. If you open the dropdown menu, you can type a few letters to filter the list. Your Algorithm will be labeled with the name you put into the Algorithm Name field in the registration form you just submitted (in this example,
rob_test_registration_2406bwith version/branchmain).
Once you have selected the Algorithm that you just registered, the form will display the inputs. By default every job has a “Job Tag” field and a “Resource” dropdown. Additionally, any inputs that you configured in your algorithm during registration will be available; in this case we have the “input_file” field.
For our test run, choose a Job Tag that’s distinctive. In this example we used test_run_2024b but you should pick your own. For the Resource, we can over-ride the one that we used during Algorithm registration; for the sake of this example we chose the same one as before (maap-dps-work-8gb).
The input_file can be any file that is publicly accessible to MAAP, for example any file on the web. As an example you can use:
https://photojournal.jpl.nasa.gov/jpeg/PIA17931.jpg
Leave the “Publish to Content Metadata Repository” section alone. This is an old placeholder feature that will be removed. You might not see that section of the Job submission form.
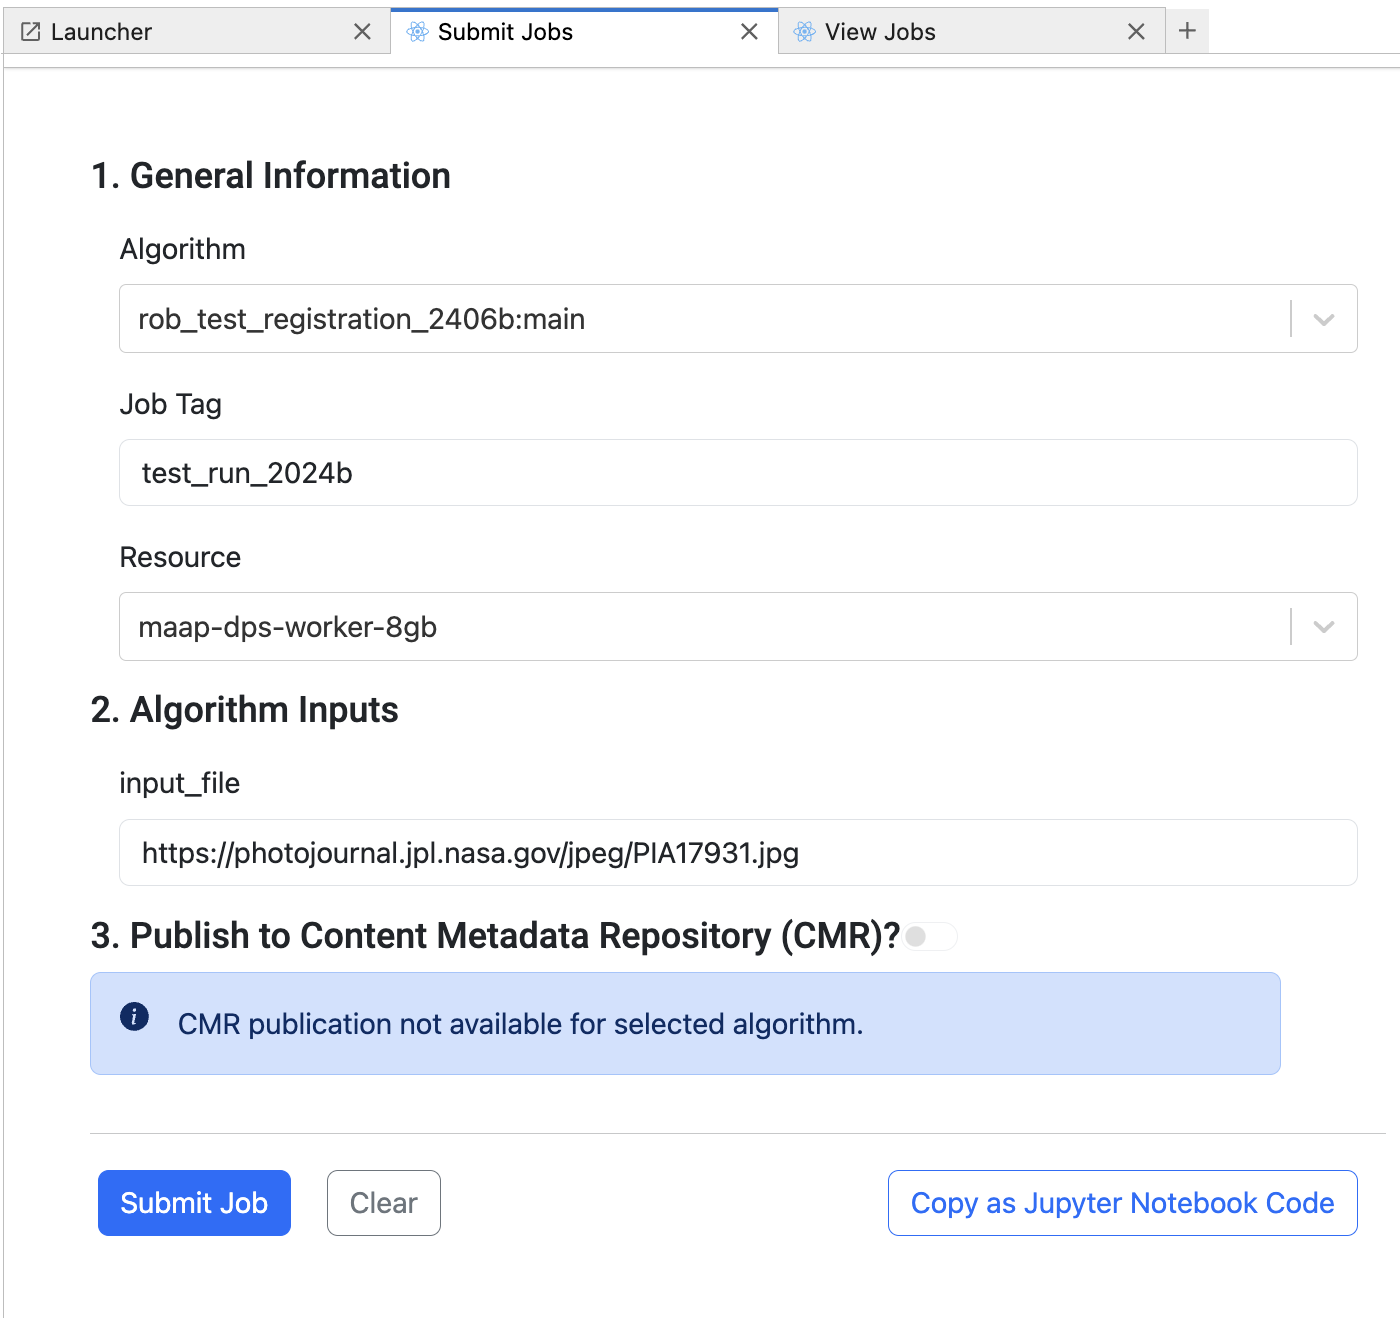
Press Submit Job. A few seconds later a message should appear beneath the button indicating a successful job submission.

Next, in the Launcher open the View Jobs tool (next to the Submit Jobs tool). If you do not see your test Job, you may need to refresh the table that opens up by pressing the button next to the “Last updated” message.
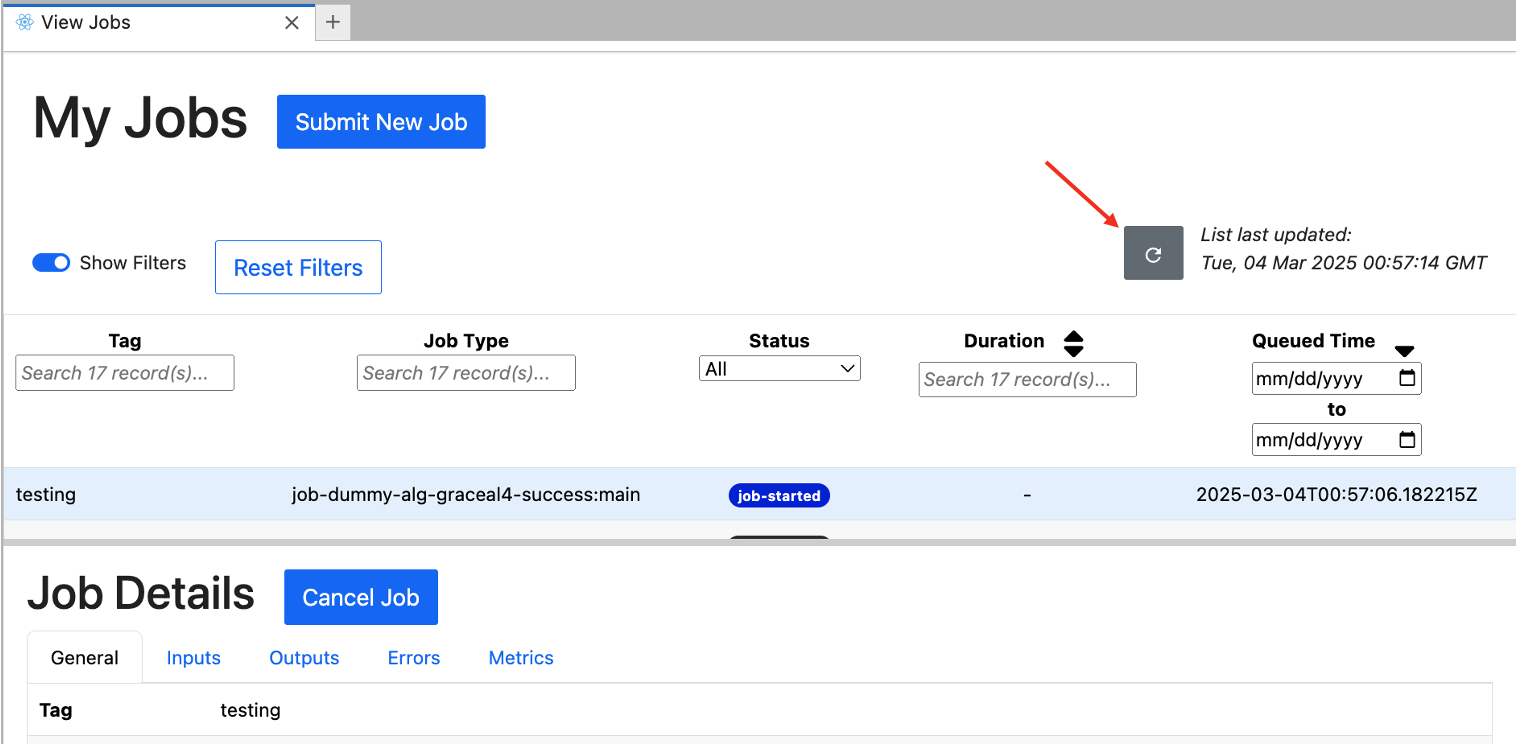
Your Job should finish shortly (use the refresh button to update the table as needed). Click on your Job in the table and the bottom panel will show the Job Details for that Job. Explore the various sections on your own to familiarize yourself with the information available.
If you select the Outputs section, you will see two buttons to help look at the outputs of your Job. “Copy File Path to Clipboard” can be useful if you need to record the path to another document, a script, or into a Terminal. “Open in File Browser” will open up the file panel in Jupyter to the output path, as shown here. Note that the demo Algorithm writes a text file called write-output.txt. 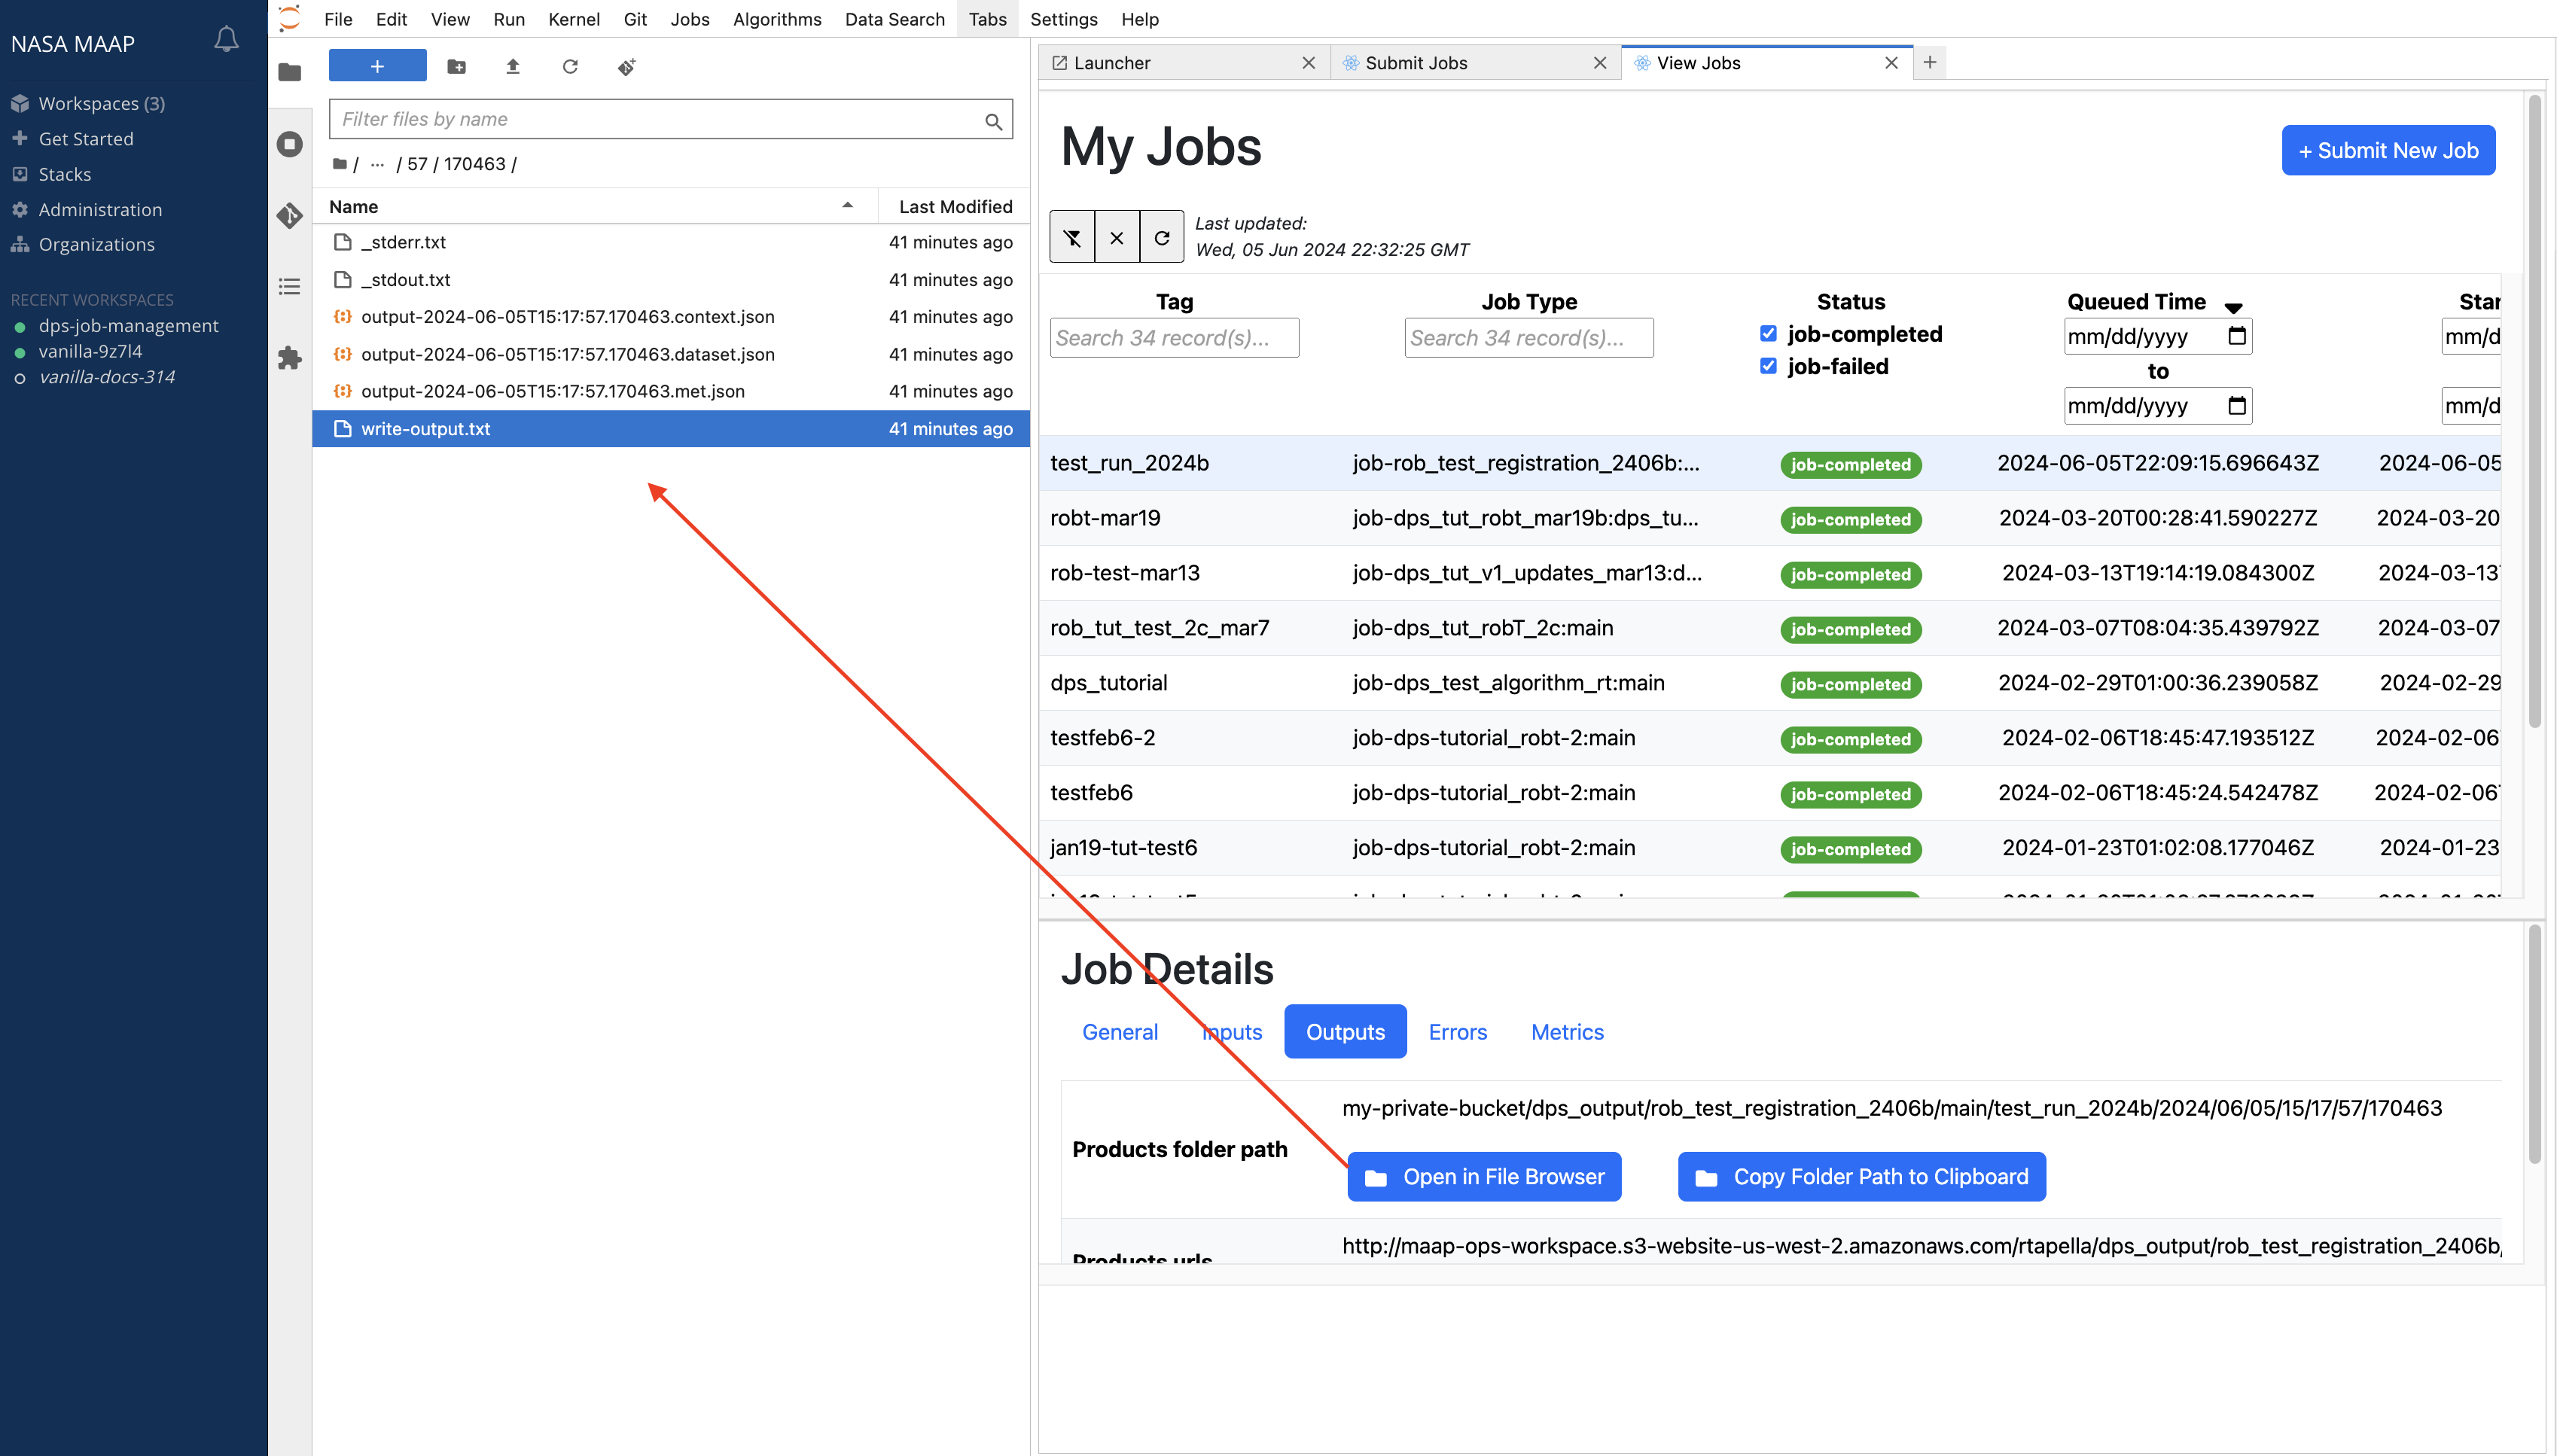
One way to get your output files is to right-click in the File Browser and choose “Download”. 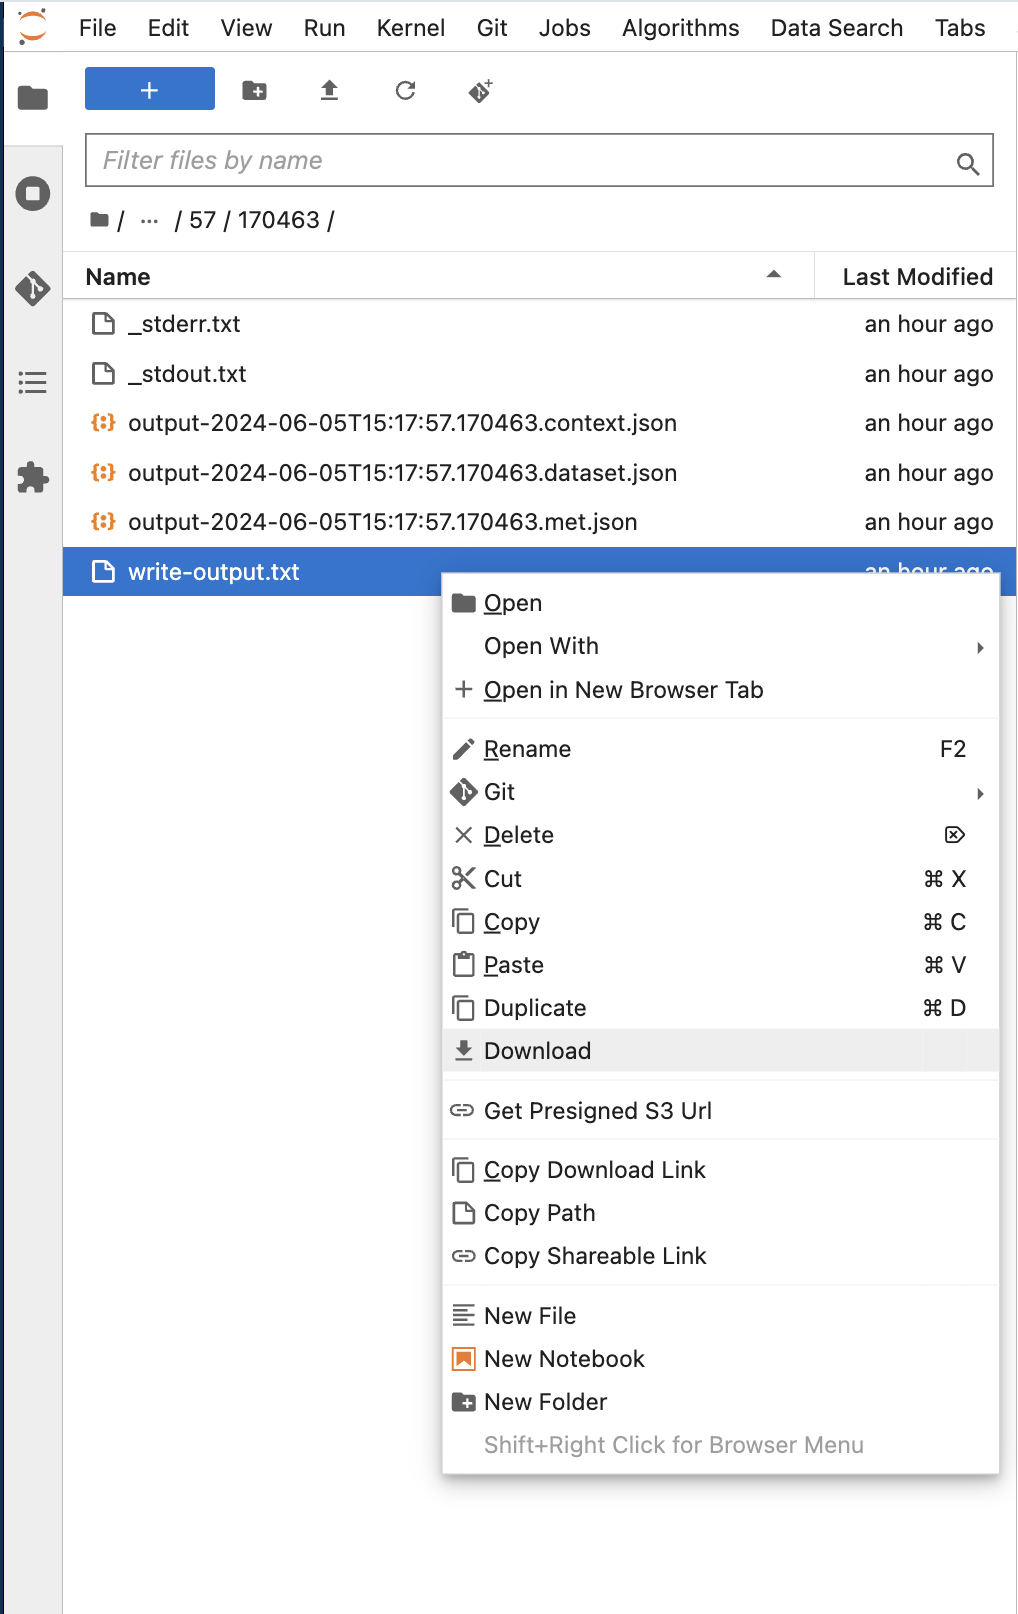
Note
Congratulations, you have run your first DPS Algorithm in the cloud!
Using maap-py
To assist connections to the MAAP system from a Jupyter notebook, a helper library called maap.py provides Python-native calls to the underlying RESTful MAAP API. Often a separate Jupyter notebook is used to run and monitor jobs with API calls.
You can find documentation on using maap-py with Python notebooks in the System Reference Guide.
Scaling Up
This basic example demonstrates the execution of a single job. You may be wondering how you would manage the cloud execution if you wanted to run many jobs at once. The answer is that you can simply keep submitting more jobs, and the system will handle the parallelization and scaling for you.
You can press Submit Job repeatedly to create additional new executions of the same algorithm (perhaps you might change the input_file for each Job) and a queue will be created that begins executing your Jobs in parallel on the cloud.
If you need more compute power for each single job (e.g. your algorithm is computationally and/or memory intensive, or if it requires a GPU) then you will select a different Resource to run on.
Conclusion
At this point you have gone through the basic steps of setting up and using the MAAP to register and execute an Algorithm in the DPS. This is an example of the first iteration of an algorithm development process that includes writing code, registering it, testing it, making modifications (re-writing code) and re-registering it, and so on.
Next you may want to explore the science example notebooks or the DPS in-depth tutorial.
If you have questions or problems to discuss, please join us at the MAAP Community site!