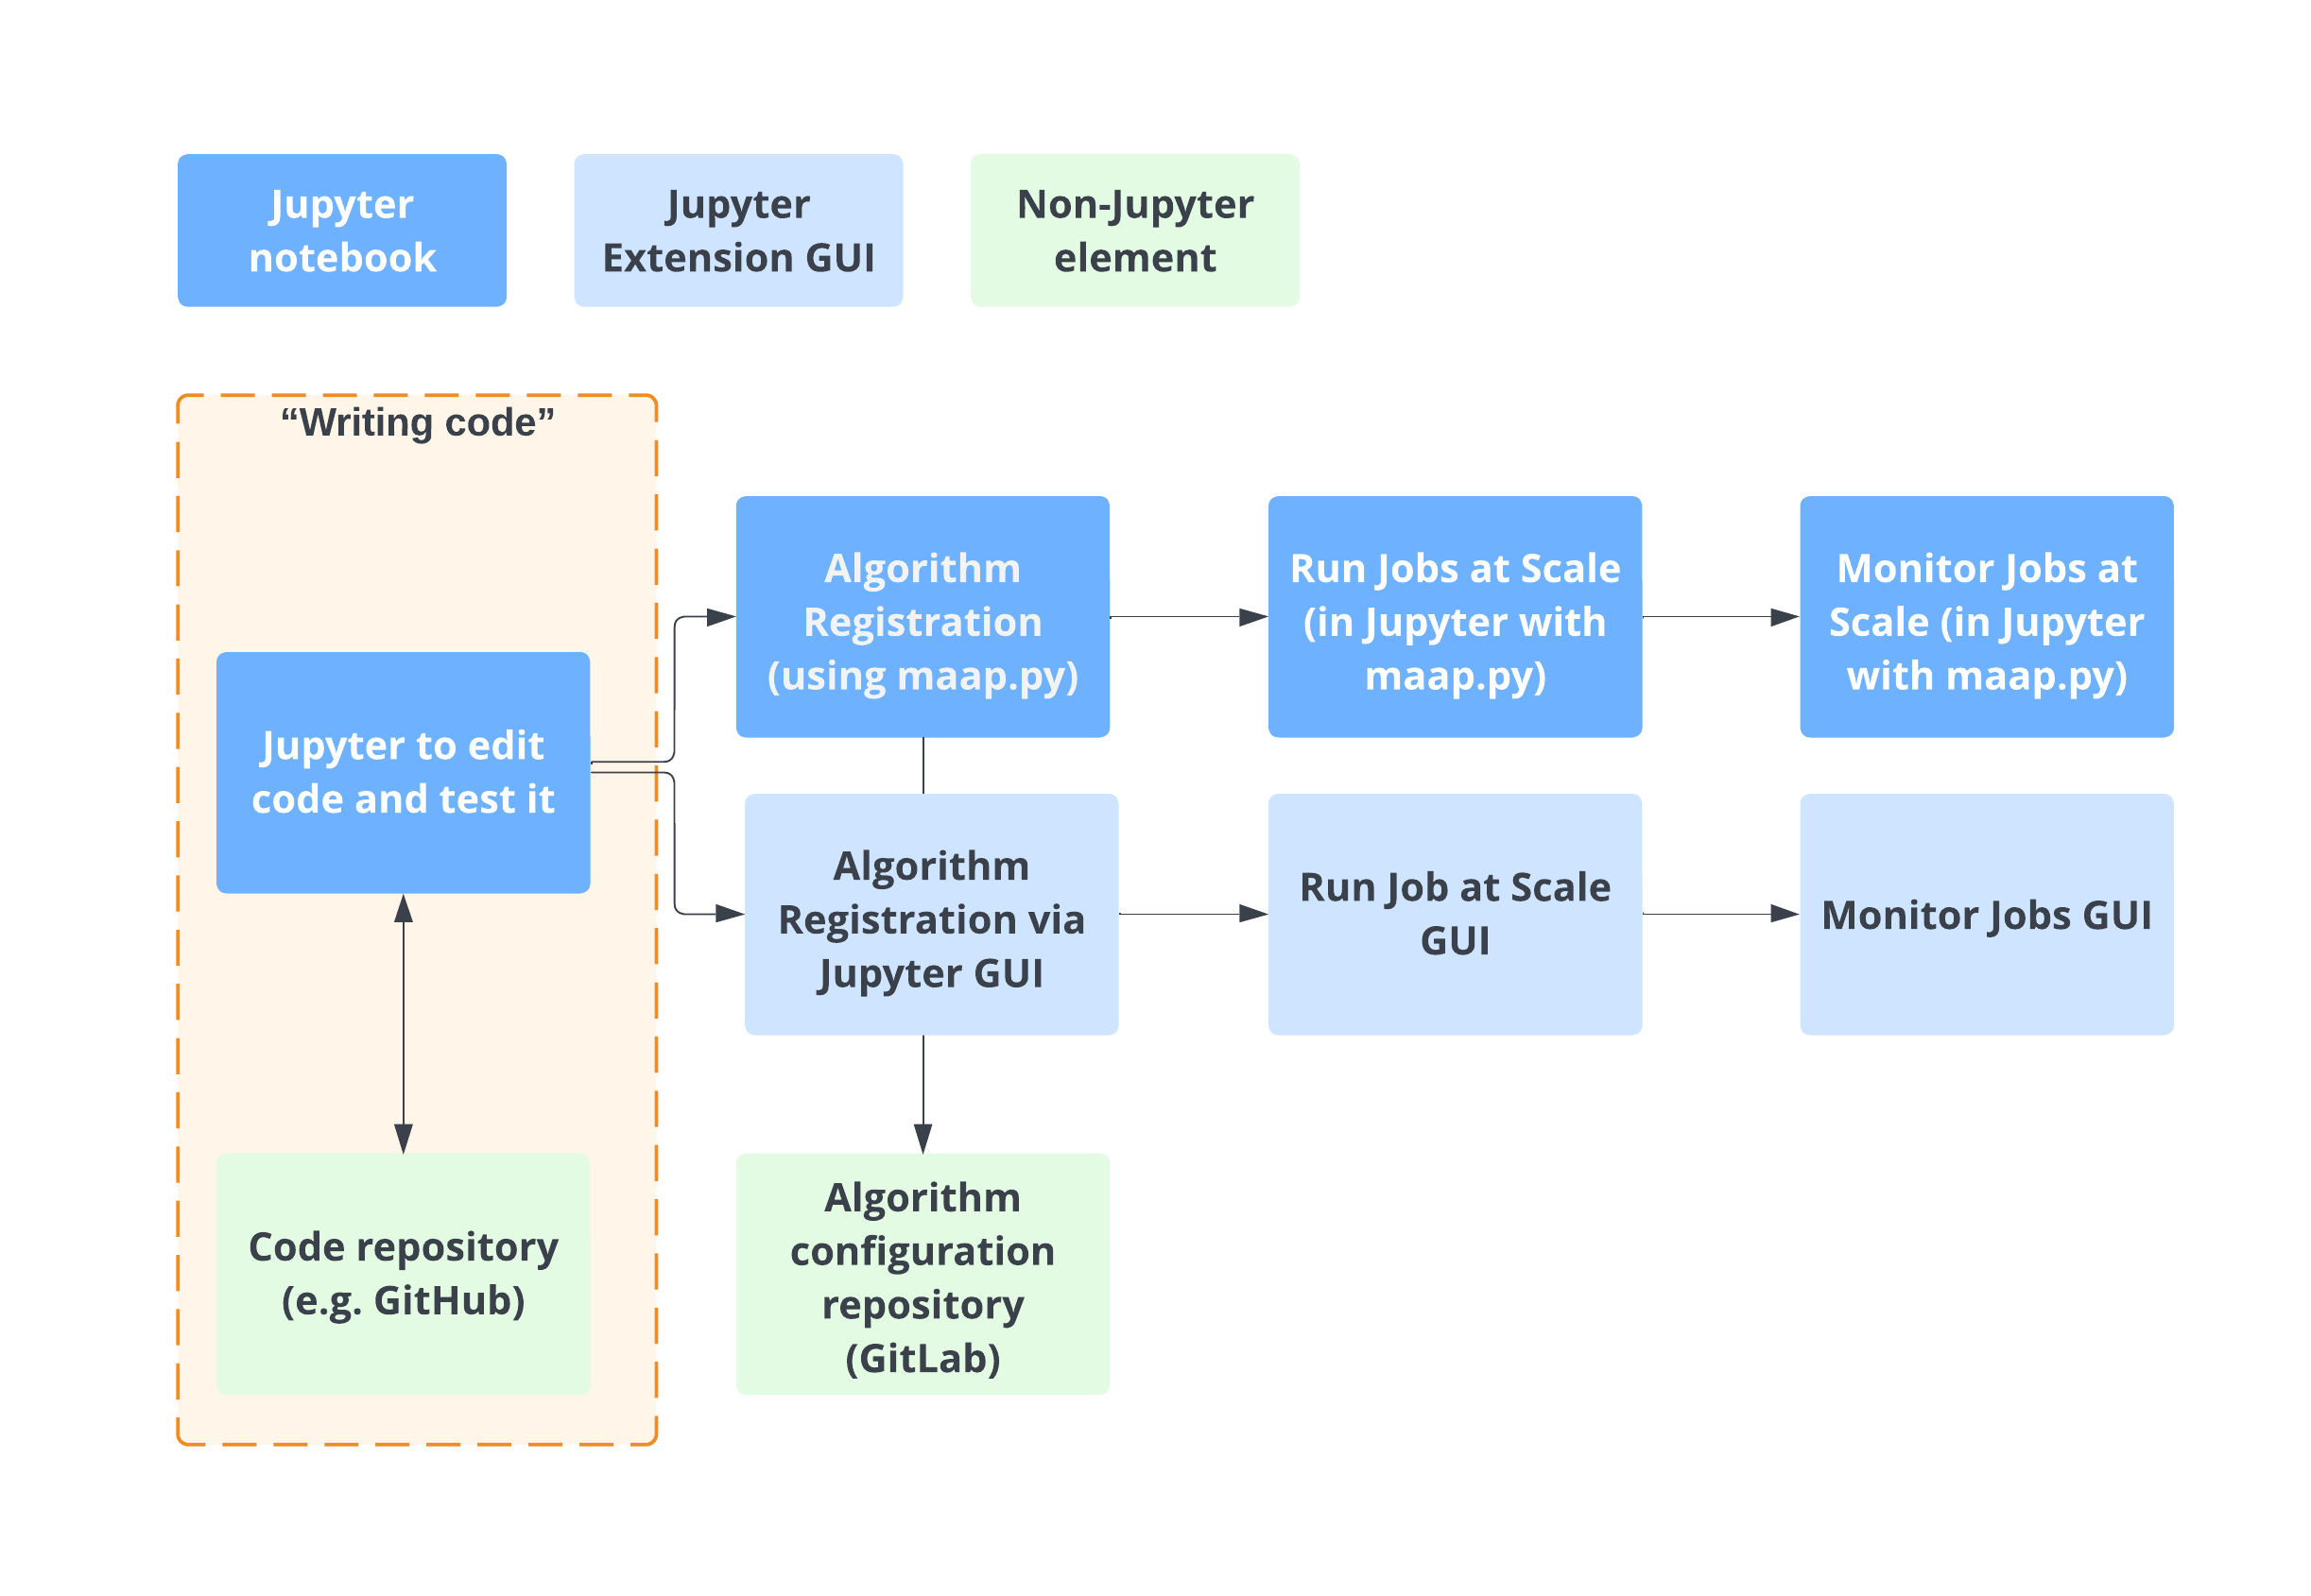
Writing and Managing Code with MAAP
Writing and editing code in the MAAP is done in a Jupyter workspace. Jupyter is a web-based development environment that allows for interactive coding in “notebooks”. MAAP supports notebooks written in Python and R with pre-configured workspace-types (“Stacks”). Jupyter has caught on with the data-science community because it is possible to write and share notebooks with code, commentary, and data-visualizations mixed together in one place.
The previous section includes some basic topics in creating a workspace and getting oriented.
Note
If you have not used Jupyter or JupyterLab before, it is highly recommended that you get acquainted with JupyterLab.
Code is version-controlled, typically using GitHub. MAAP Jupyter includes a GUI widget to help with code push/pull as a sidebar tool. Git is intended to help with collaborative code development and version-control.
Note
If you have not used Github or git before, it is highly recommended that you get acquainted with Github. For a quick reference to git commands there is a Git Cheat Sheet in a variety of languages.
Working with code repositories like GitHub and GitLab
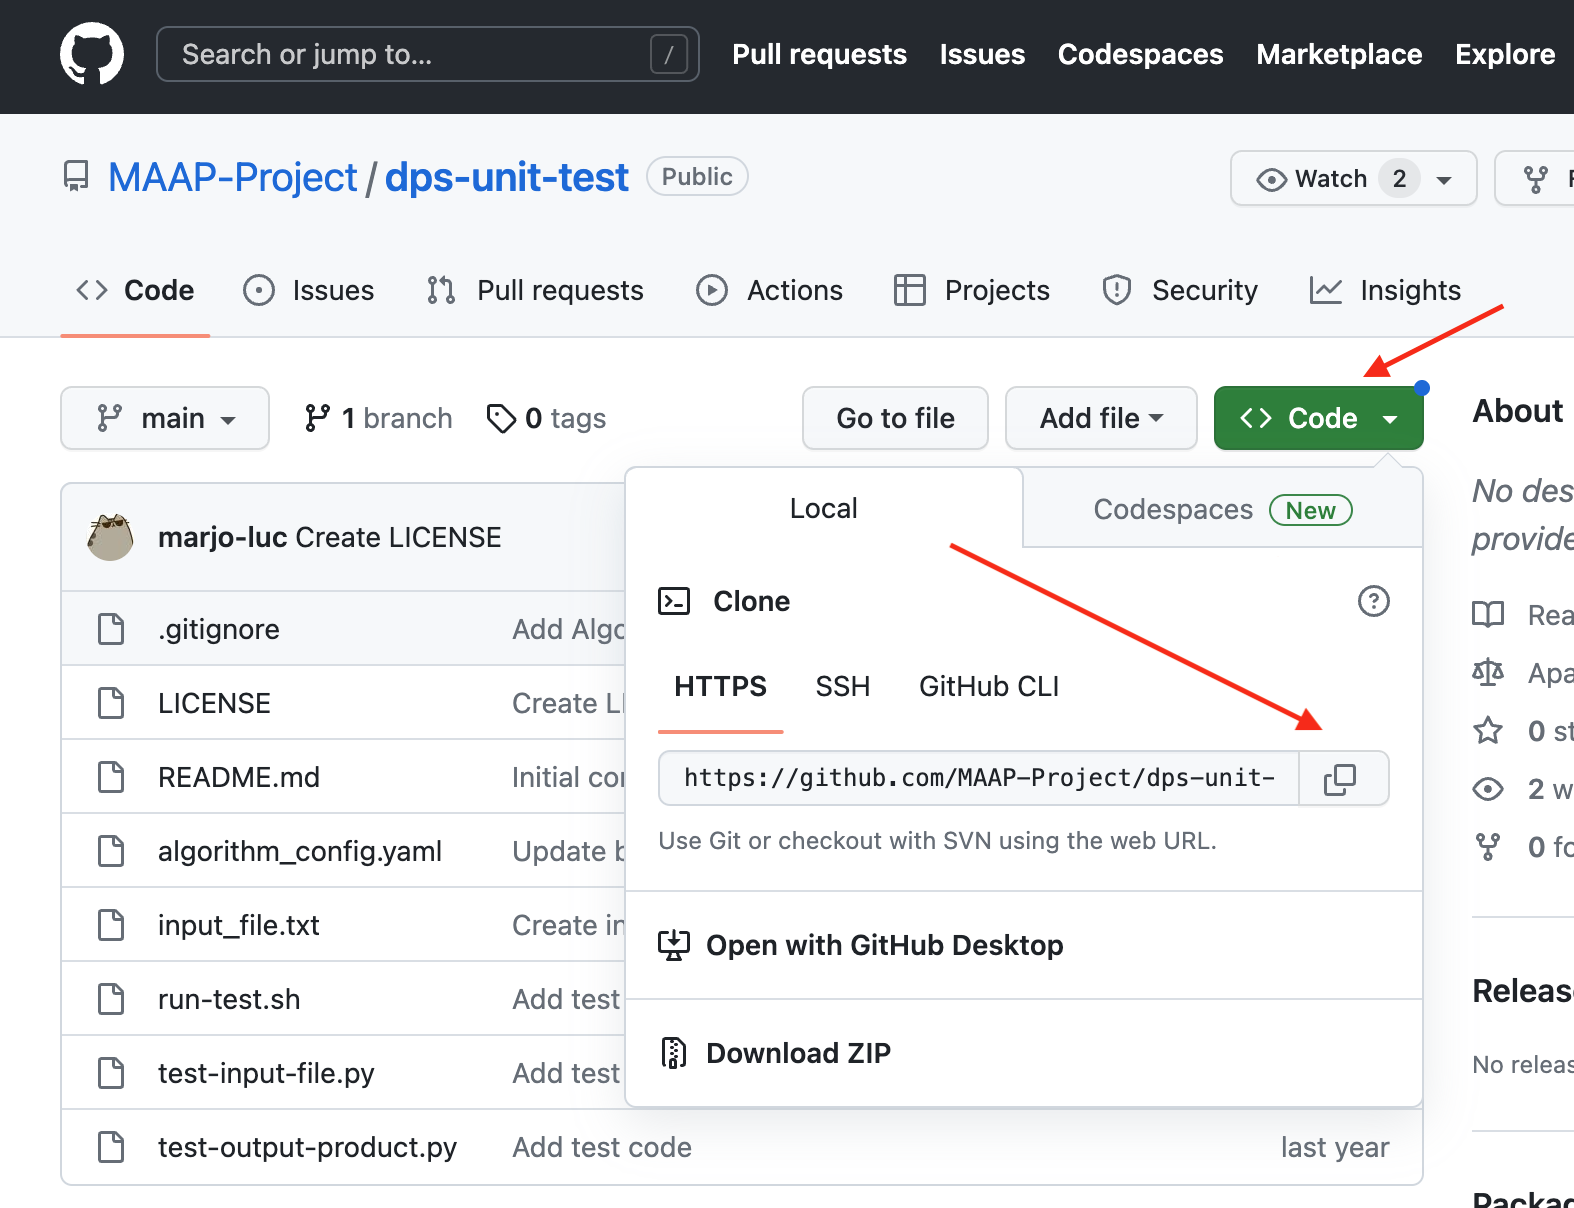
Clone a Repository with GitHub
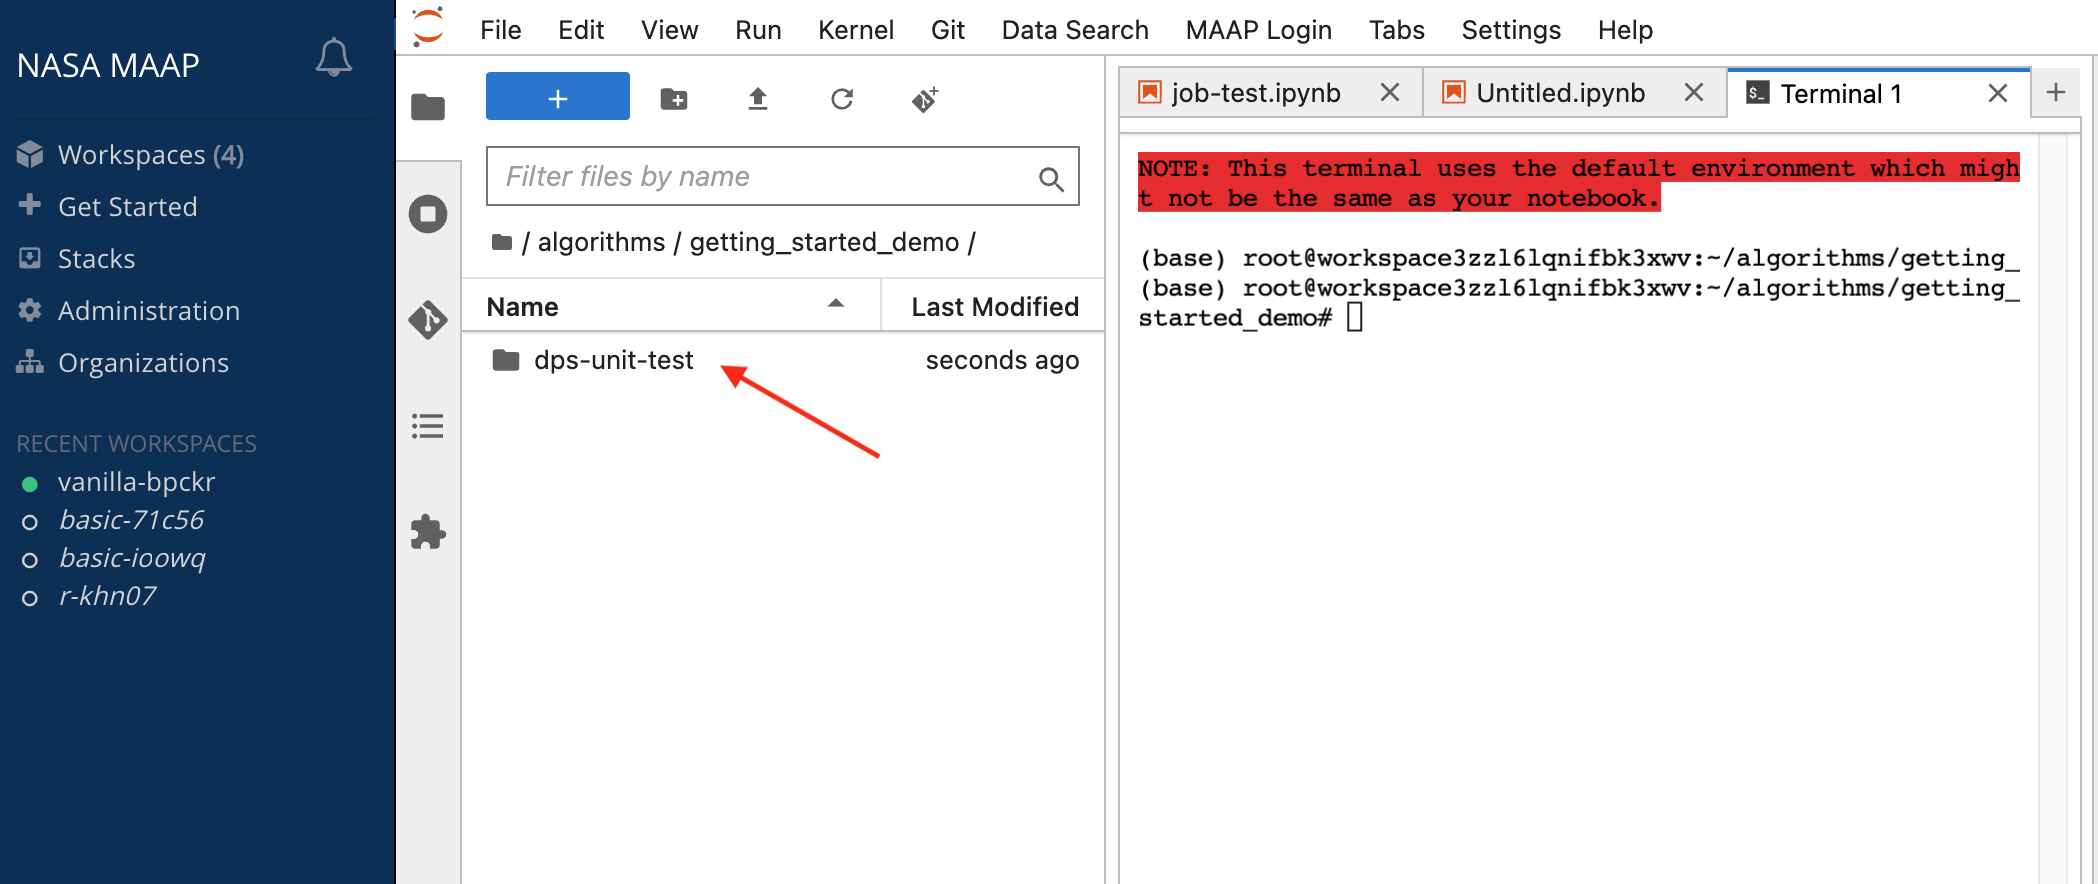
Here is an example repository you can use for this getting started guide: https://github.com/MAAP-Project/dps-unit-test
Copy the Github clone link from https://github.com/MAAP-Project/dps-unit-test
Open the built-in Jupyter Github UI to the left of the file browser. Choose “Clone a Repository” and paste in the .git link you copied from the Github repository. You can also access this menu through the Git tab at the top of the Jupyter window.
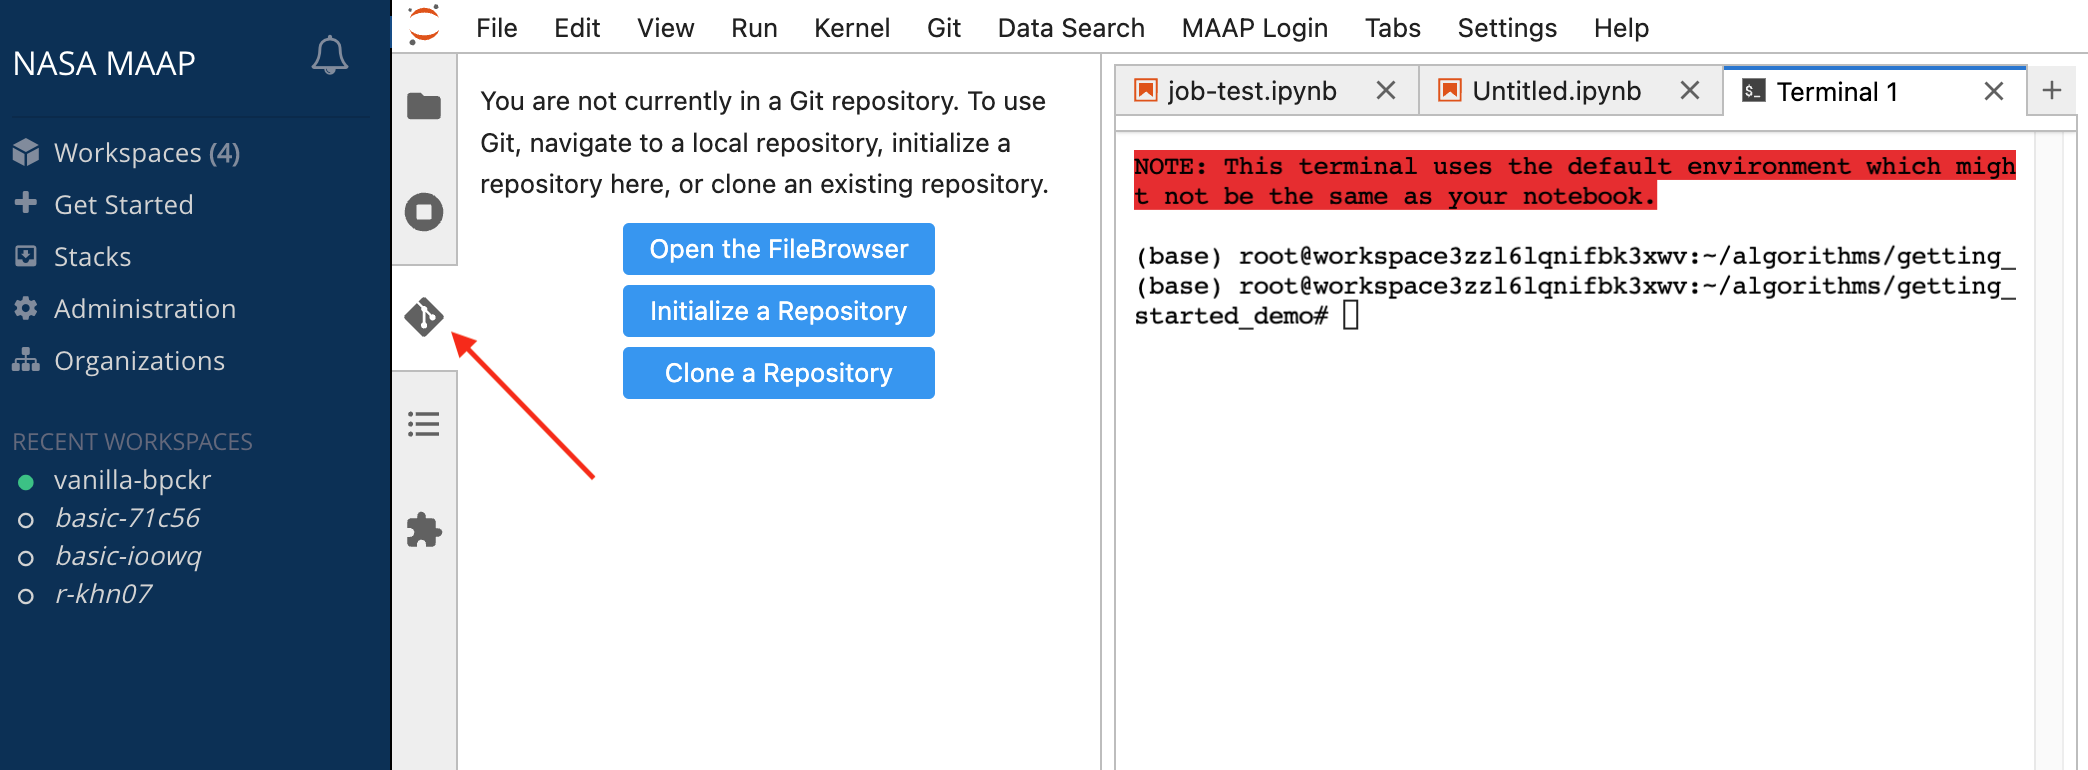
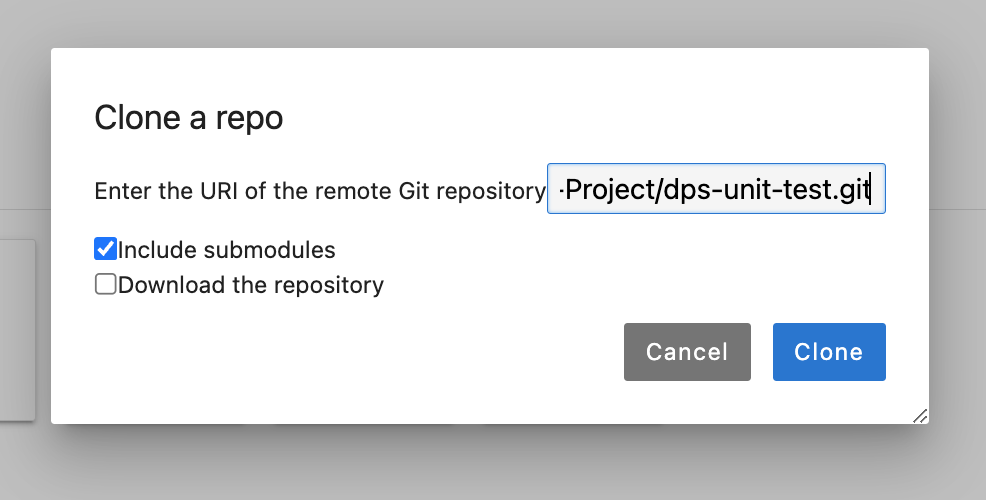
You should see a new folder created with the repo you cloned. If you browse to that folder and open up the Jupyter Github UI again, it will show you some info about that repo.
While developing an algorithm, this is how you would manage pushes and pulls to and from GitHub. For the purpose of this guide, there is no need to push or pull changes.
The MAAP GitLab Code repository
After creating your MAAP account, you can create a code repository by navigating to the MAAP GitLab account at https://repo.maap-project.org. This GitLab account is connected to your ADE workspaces automatically when signing into the ADE.
You can then follow the same steps above to clone a repository from the MAAP GitLab.
Typically, scientists have been storing code in GitHub, but the built-in GitLab is available if you prefer.
Testing an Algorithm the Workspace
To make sure that an Algorithm is functioning as expected, we can run it in the Jupyter terminal in a way to mimic how the scaled DPS (Data Processing System) will run it.
To do this, you will want to run the run-test.sh script from another folder. For the sake of this test, let’s try running it in /tmp/my_test_run. You can call the folder whatever you’d like, maybe with your name in it to make it unique (e.g. /tmp/robs_test_run).
When the DPS runs an algorithm, it will first copy input files into a folder called input/. It will write outputs into a folder called output/. In order to mimic this, let’s copy a test file from the dps-unit-test repo into a temporary test-run folder /tmp/my_test_run/input. (When we get to the actual run in the DPS, you will specify an input file URL and that file will be downloaded into the input/ folder
of the cloud-worker before execution of the algorithm.)
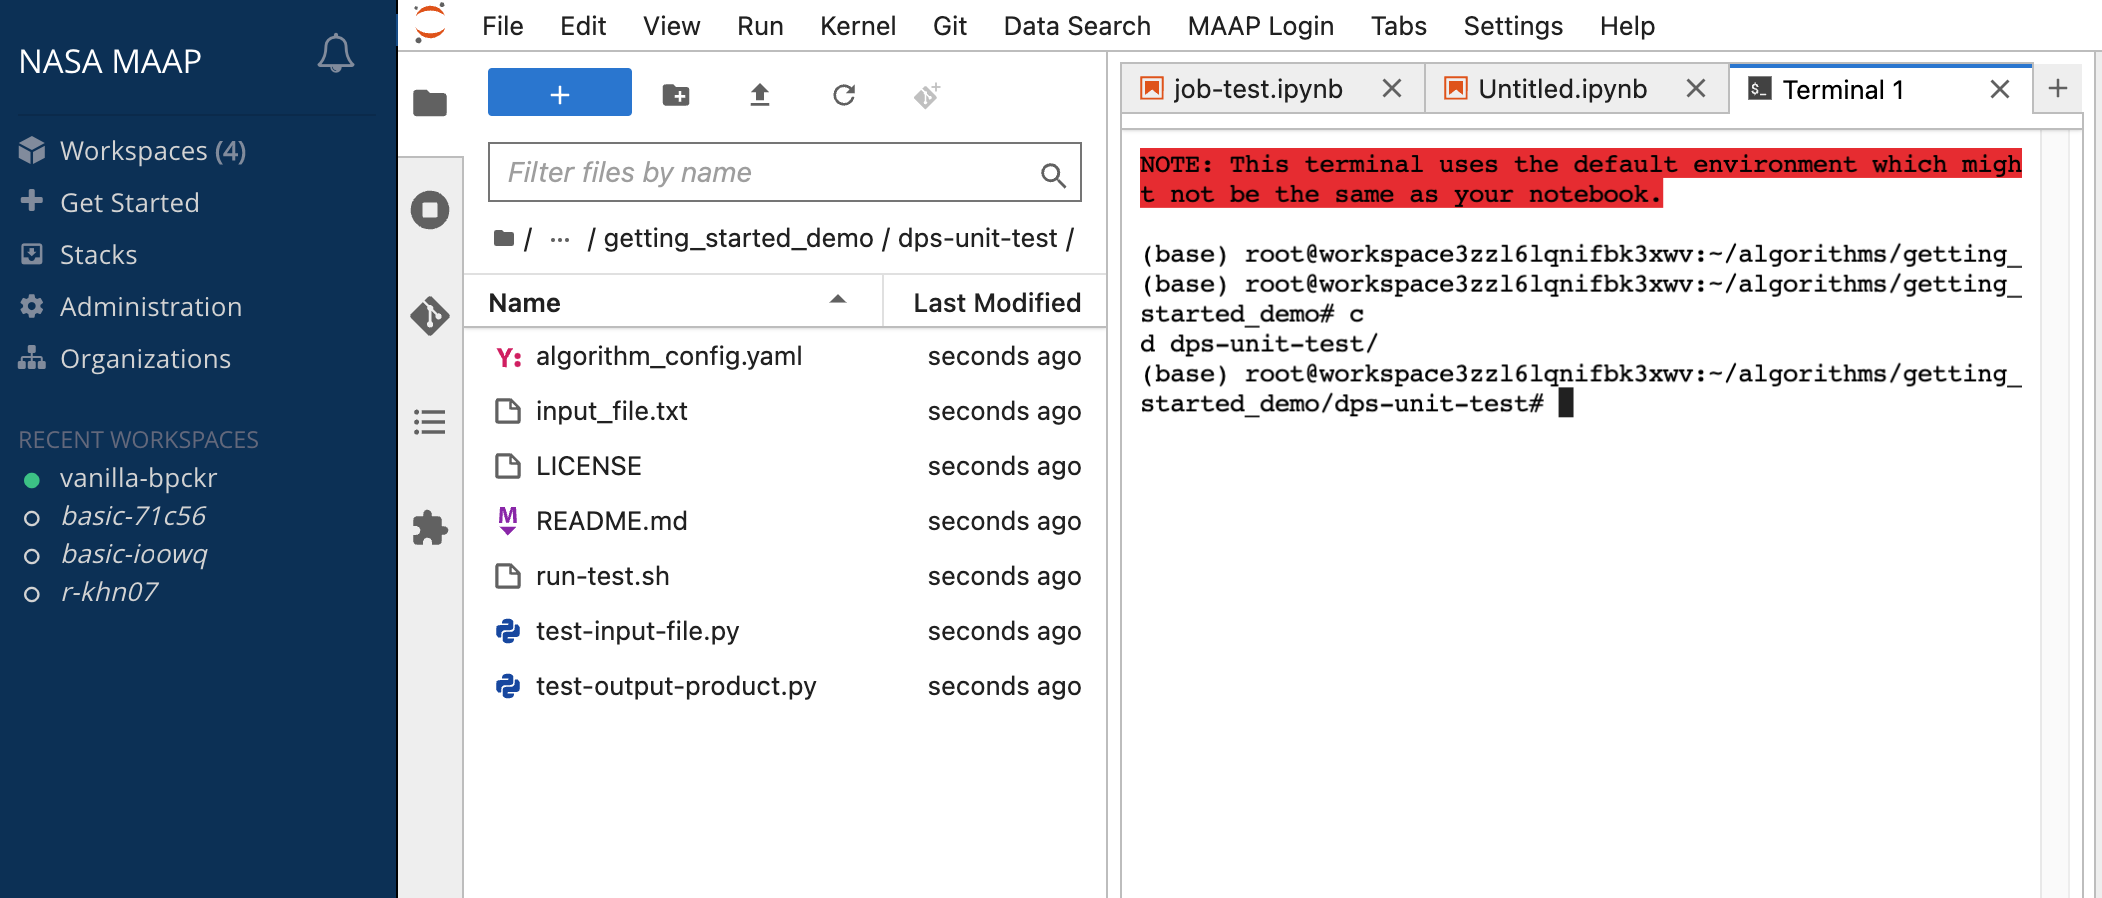
If you cloned the demo repository to ~/algorithms, then the files should be somewhere like ~/algorithms/dps-unit-test. For the sake of the example below, we will assume this is where the demo repo has been cloned.
First copy the example input file into a folder called input/, from inside your temporary test-run folder.
mkdir /tmp/my_test_run
cd /tmp/my_test_run
mkdir input
cp ~/algorithms/dps-unit-test/input_file.txt input
ls input
This should show you the contents of the input/ folder is the file input_file.txt.
Then we can execute a test run of the run-test.sh script found in the repository you cloned.
cd /tmp/my_test_run
~/algorithms/dps-unit-test/run-test.sh
If the run was successful, you should see the following output:
Testing writing output product
Testing opening input file
Opening input file input/input_file.txt success
Then if you do ls * you should see the content of the input/ and output/ folders:
> ls *
input:
input_file.txt

output:
write-output.txt
If the run was not successful, you may not have created the input folder with the input file in it. This may also happen if you run the run-test.sh script from the a different folder (where there is no input/ folder). In that case you will see an error something like this:
ls: cannot access 'input/*': No such file or directory
Testing writing output product
Testing opening input file
Traceback (most recent call last):
  File "/projects/algorithms/dps_unit_test/dps-unit-test/test-input-file.py", line 6, in <module>
    input_file = sys.argv[1]
                 ~~~~~~~~^^^
IndexError: list index out of range
Customizing your Workspace Environment
Your Jupyter workspace has a set of pre-installed libraries, depending on which Stack you selected. If you need libraries that are not pre-installed, we suggest using an environment manager; conda is pre-installed to help with this.
Full documentation on configuring conda environments may be found in the System Reference Guide.
Using maap.py to access MAAP functionality from Python notebooks
The MAAP platform offers a variety of functionality to run and monitor large-scale processing jobs. Access to the functionality is gained via the underlying RESTful MAAP API. In a Python notebook, you will typically use this API via a helper library called maap.py, which will make using MAAP platform features easy, using Python syntax. For example, registering algorithms, running batches of jobs, monitoring jobs, or accessing data.
Much of the maap.py functionality is documented in the Technical Tutorials section and in-context in the Science Examples. The maap-py Github page has additional usage documentation.
Helpful Templates while developing Algorithms in MAAP
This algorithm repository example is a good starting point for a new algorithm, as it contains the various accessory files that facilitate running the algorithm at scale
Which templates will help you? Let the development or documentation team know!
For example: conda.yml with some default packages, run_script.sh
Registering the Algorithm
This section briefly demonstrated how you will sync algorithm code with GitHub as you develop it. Once your algorithm is ready to be run at scale, you will need to Register it with the MAAP DPS.
The next section covers this process.